Quick start – eng
Installation
Requirements
CPU: Intel Core i5 10Gen+
RAM: 8—16Gb+
HDD: 20GB for system installation, for archive recording — approx. 1TB for1 FullHD Camera per month
GPU: nVidia GTX1660 6Gb+
Setup file download
Installation process
- Run setup file.
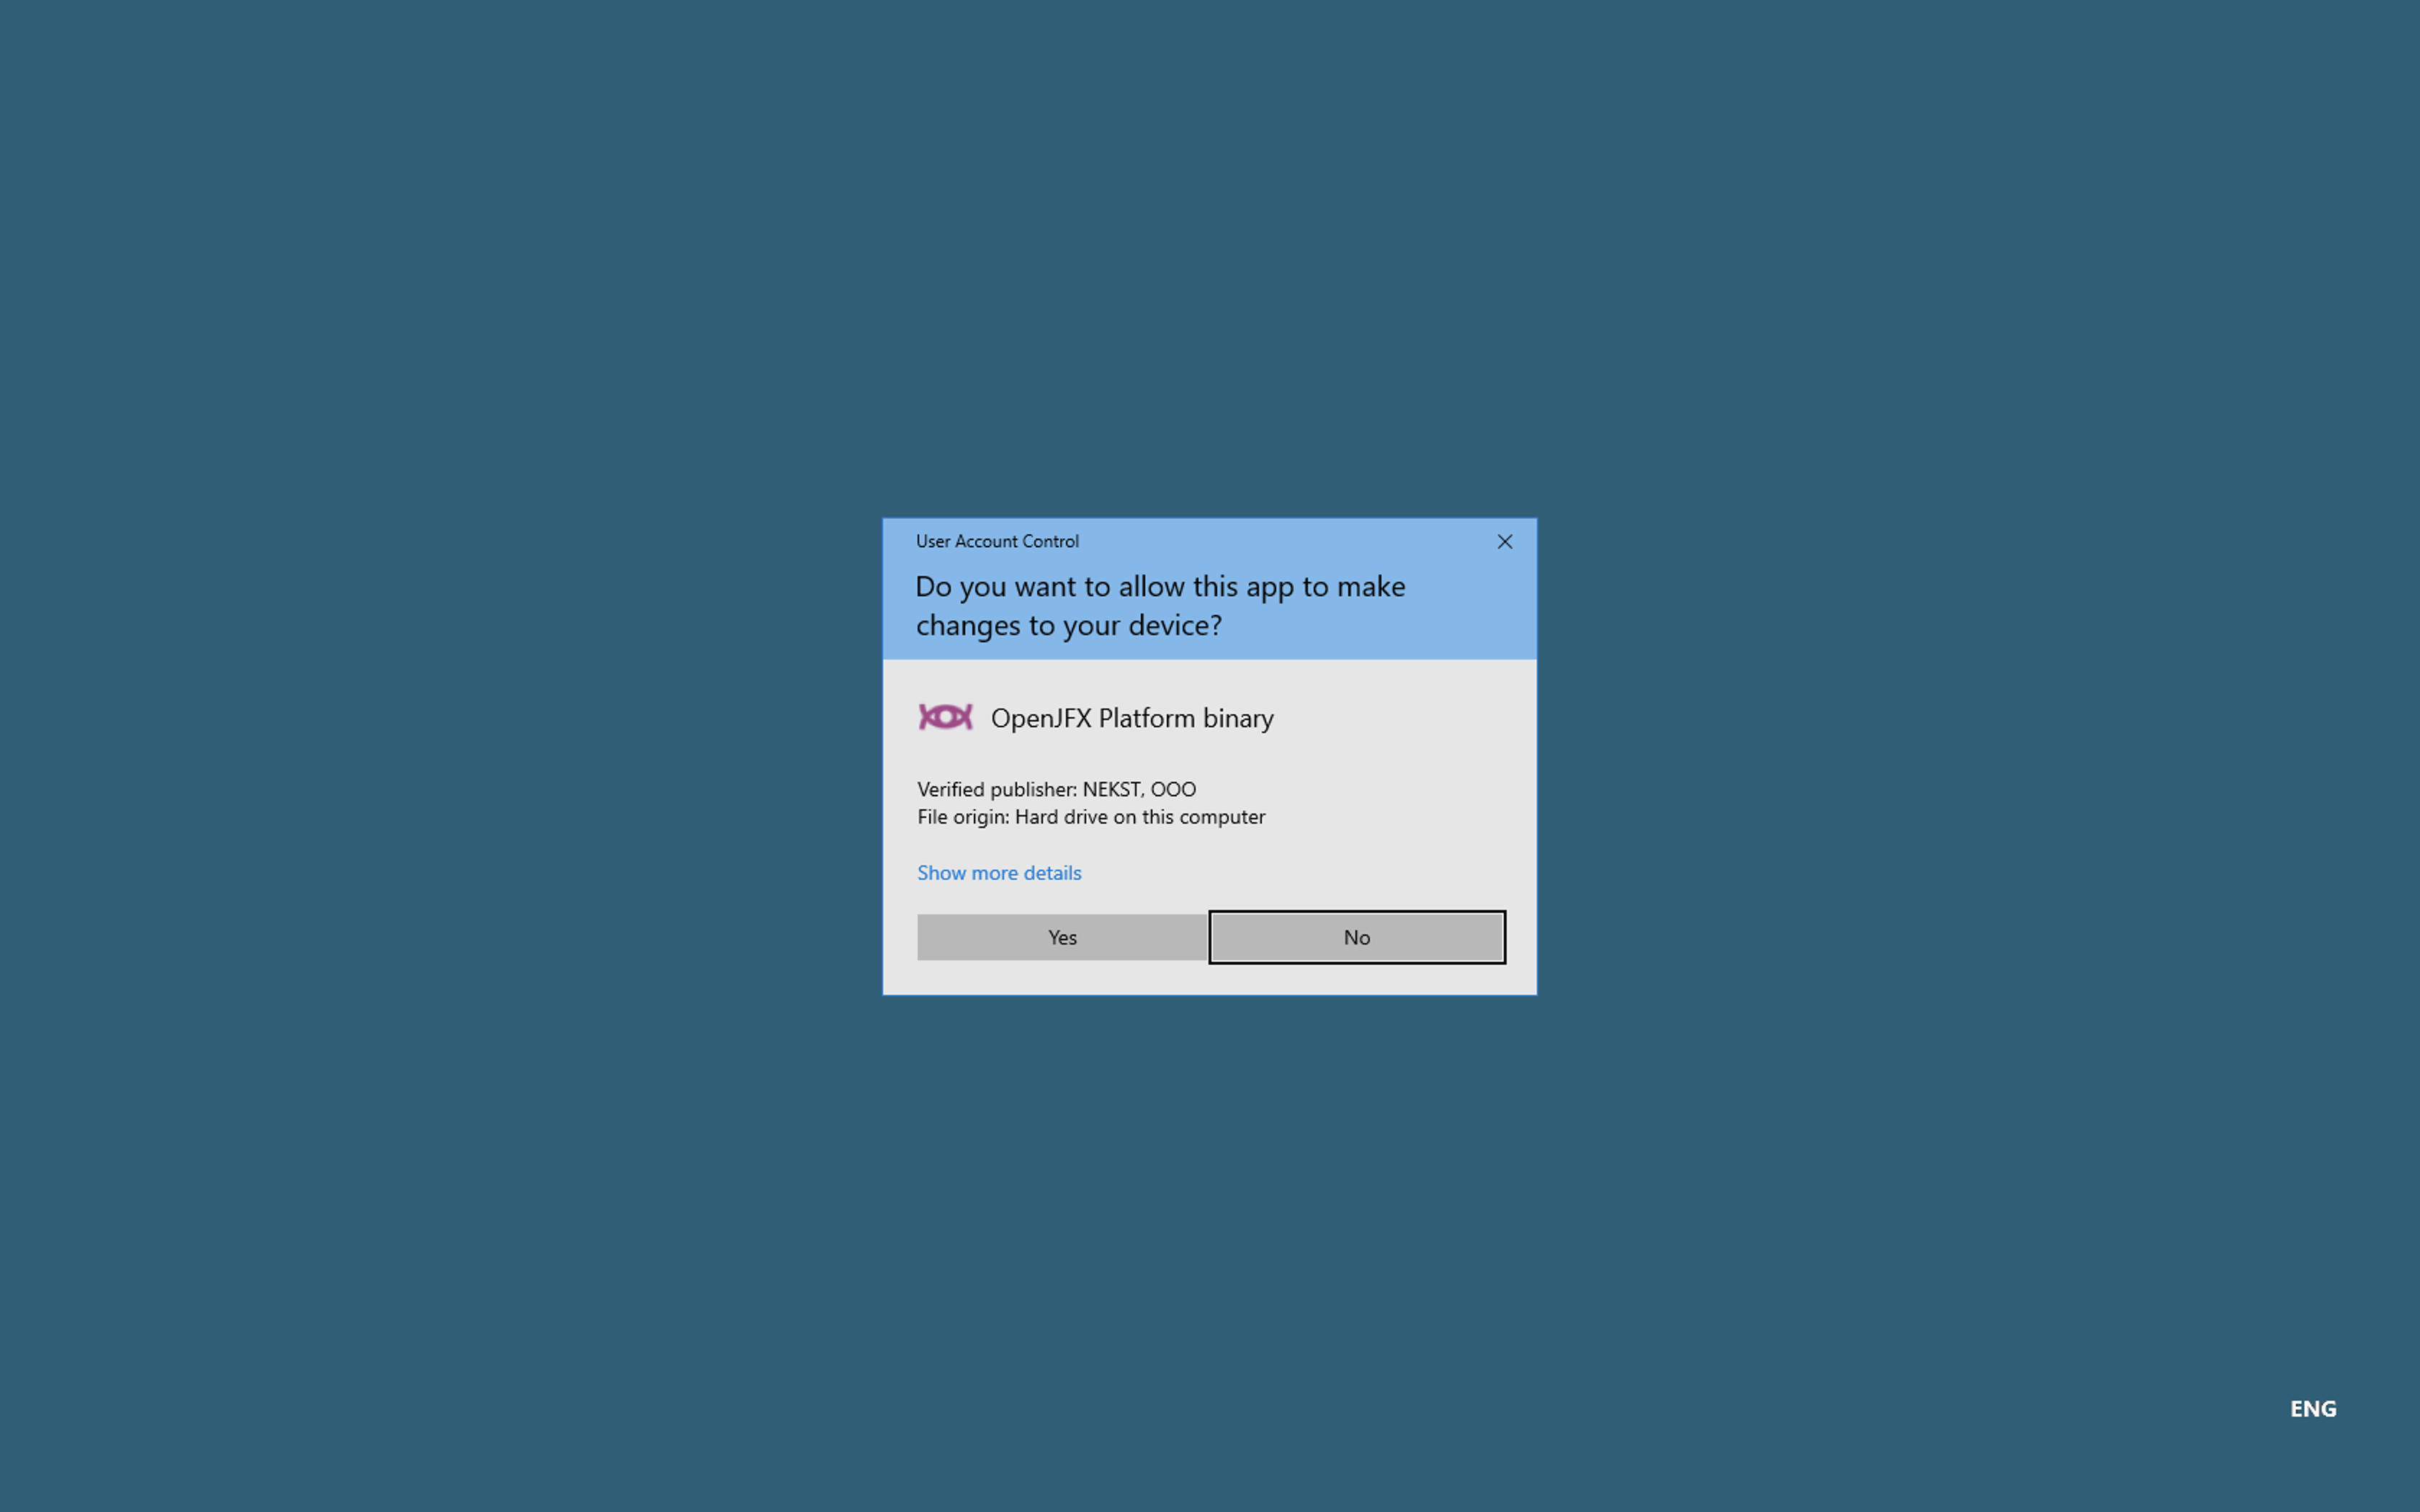
- Accept Windows security dialog.
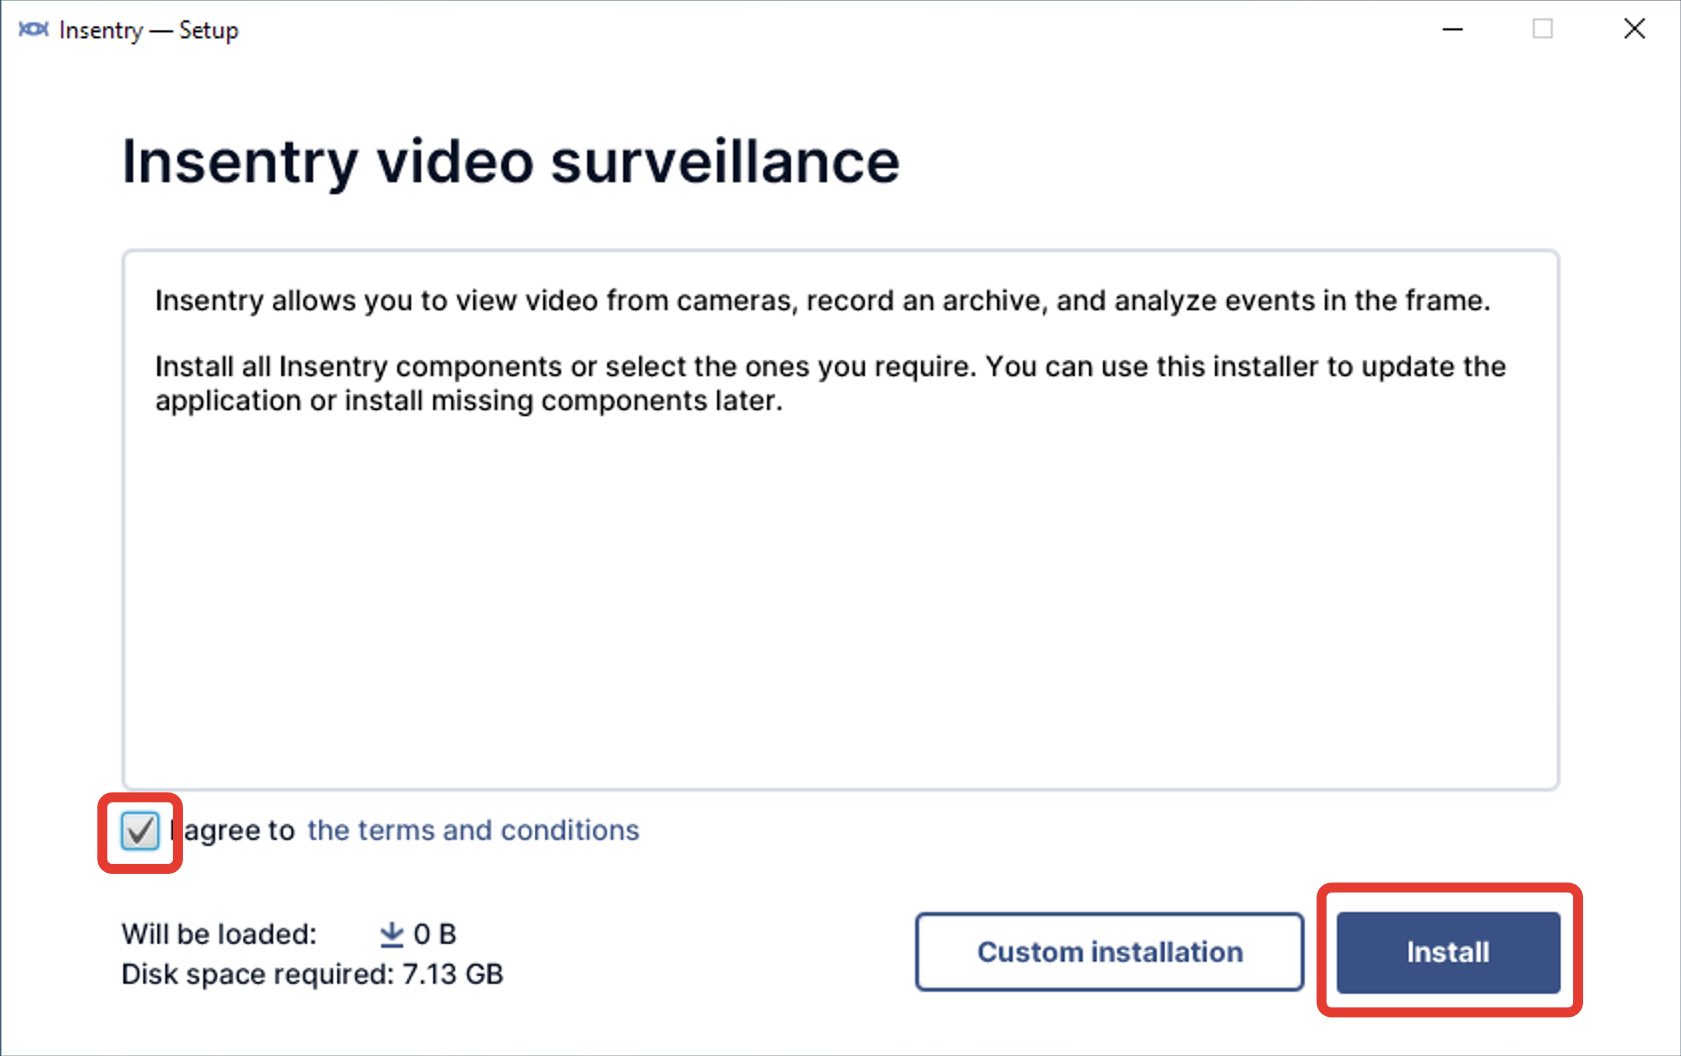
- For typical install you have only to Agree with terms and conditions and click Install.

Configuration
First start
After installation you will be redirected to the web-client app.
Alternatively you can access web-app using http://localhost:9200 on the PC/server where installation was made.
During first start of web-client you have to create admin user and set password.

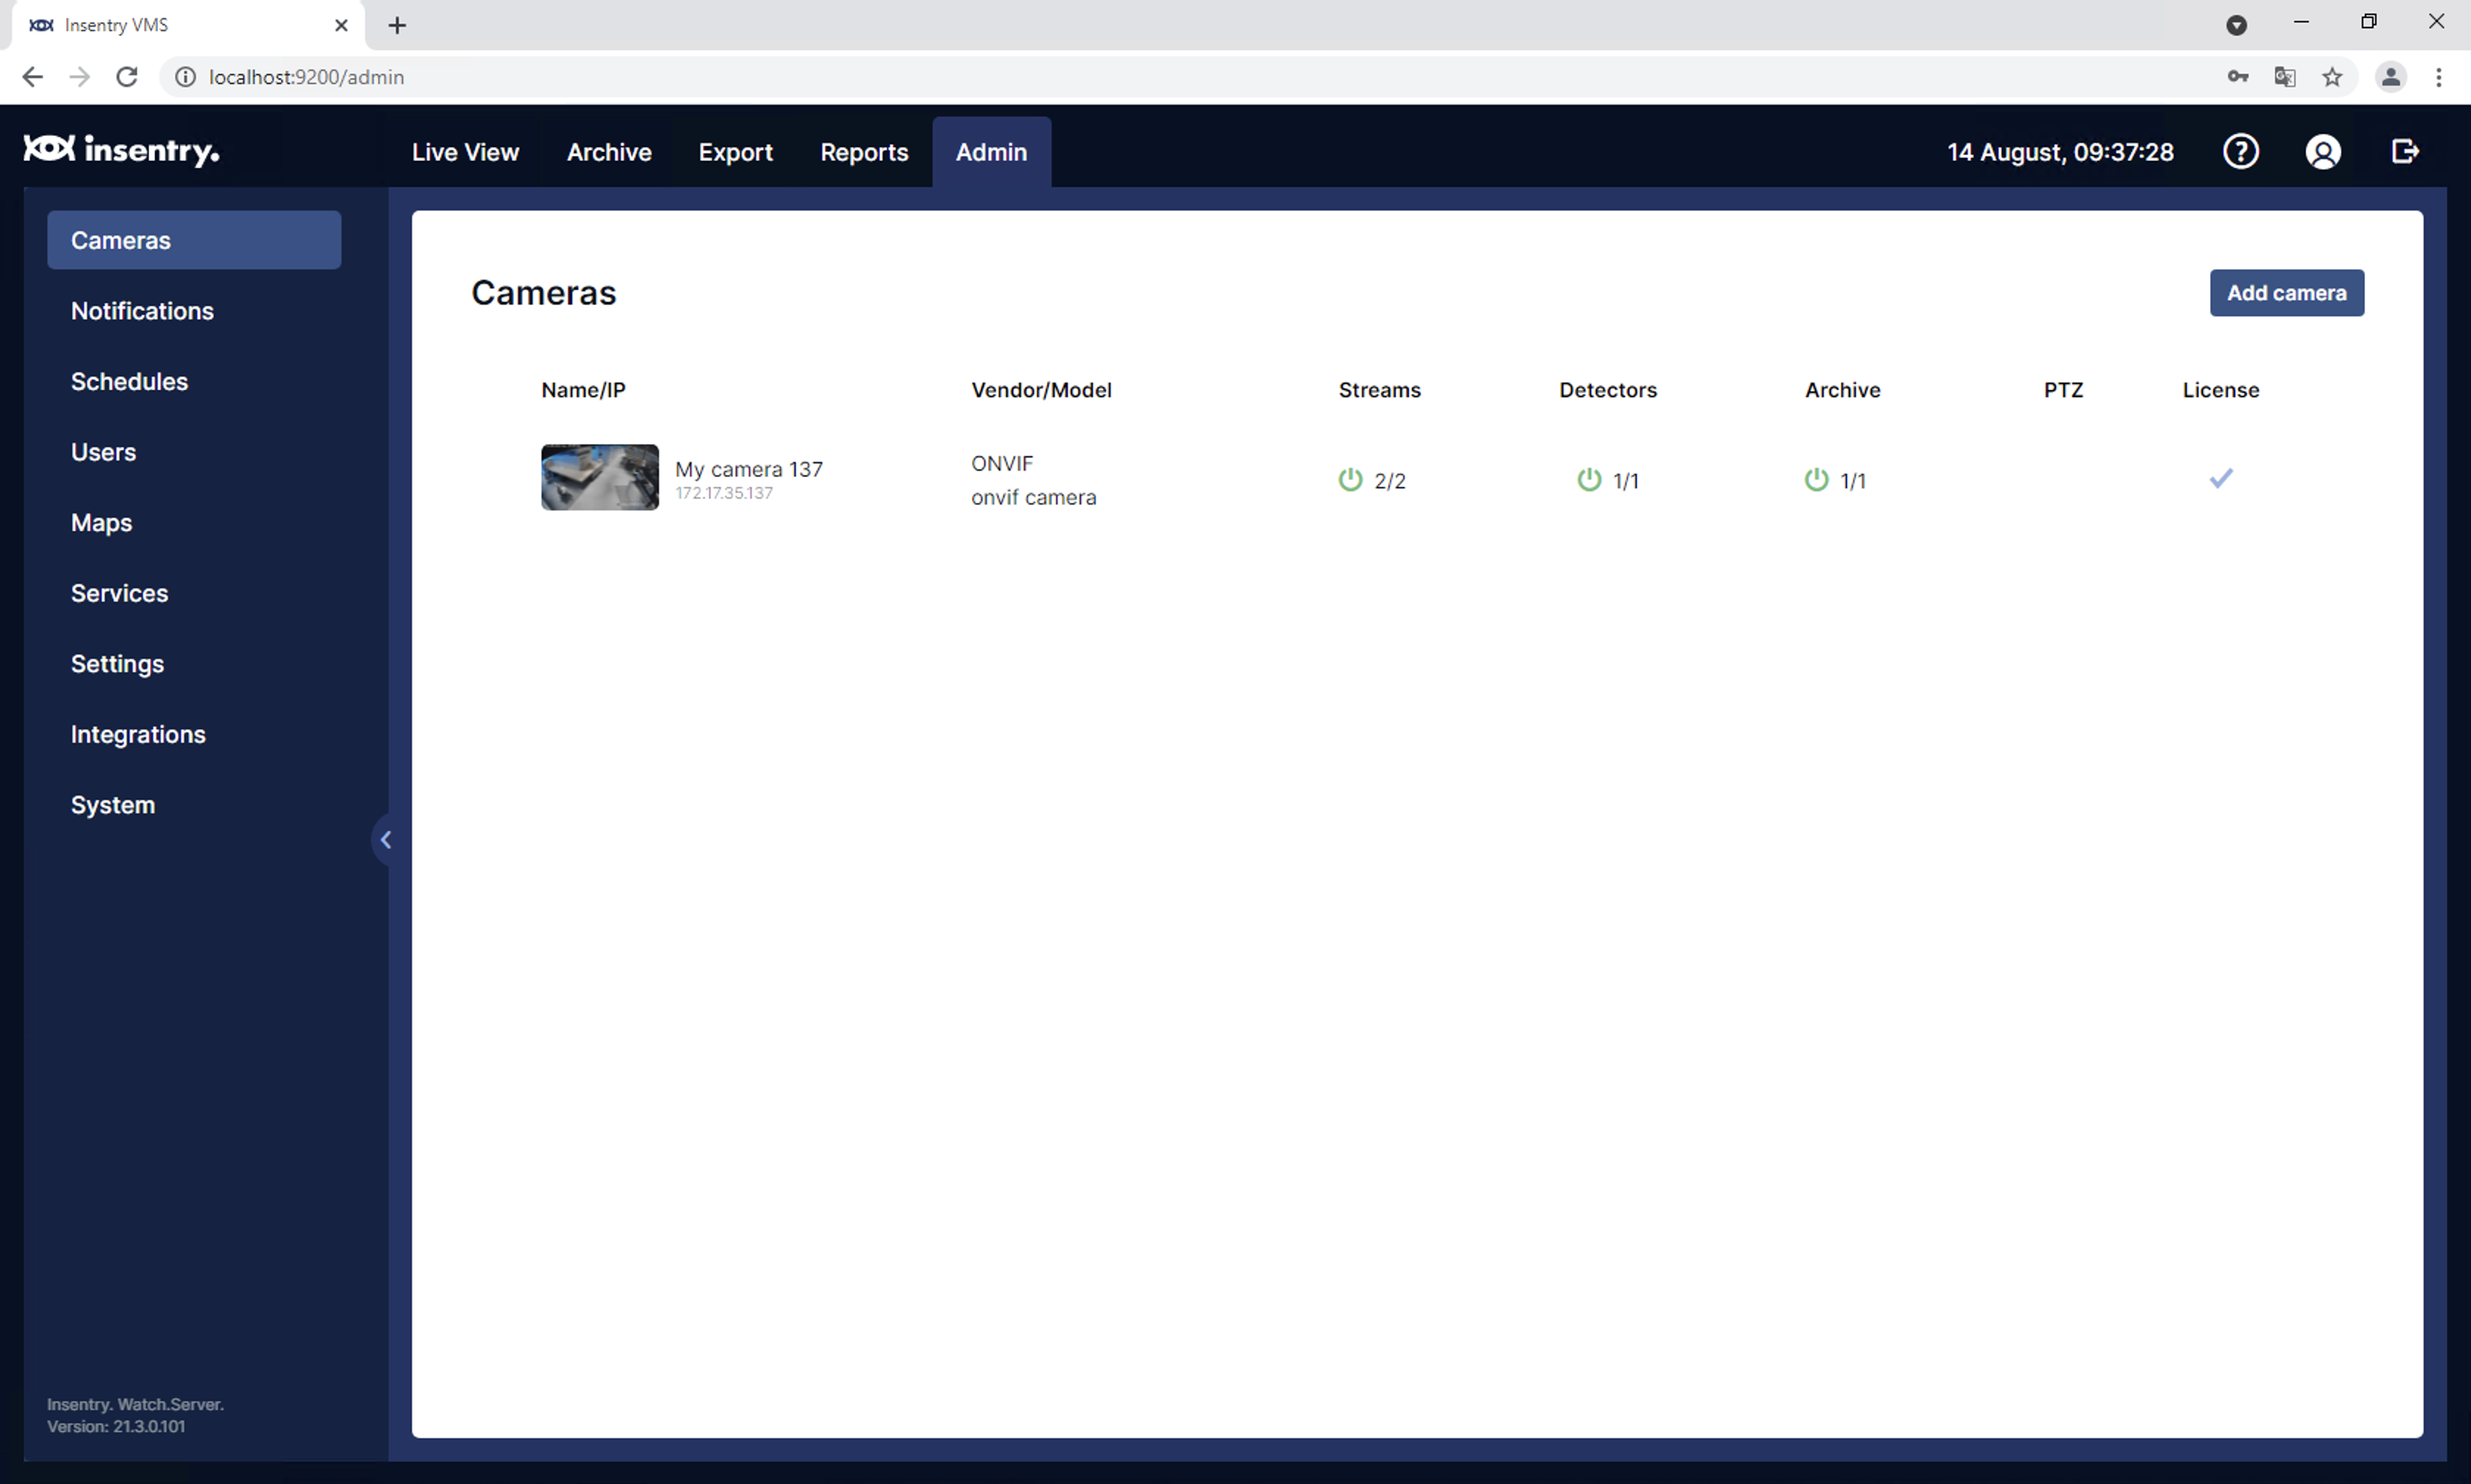
After configuring admin account you will be redirected to Admin tab, Cameras list.
.png)
Here you can add IP cameras from your network.
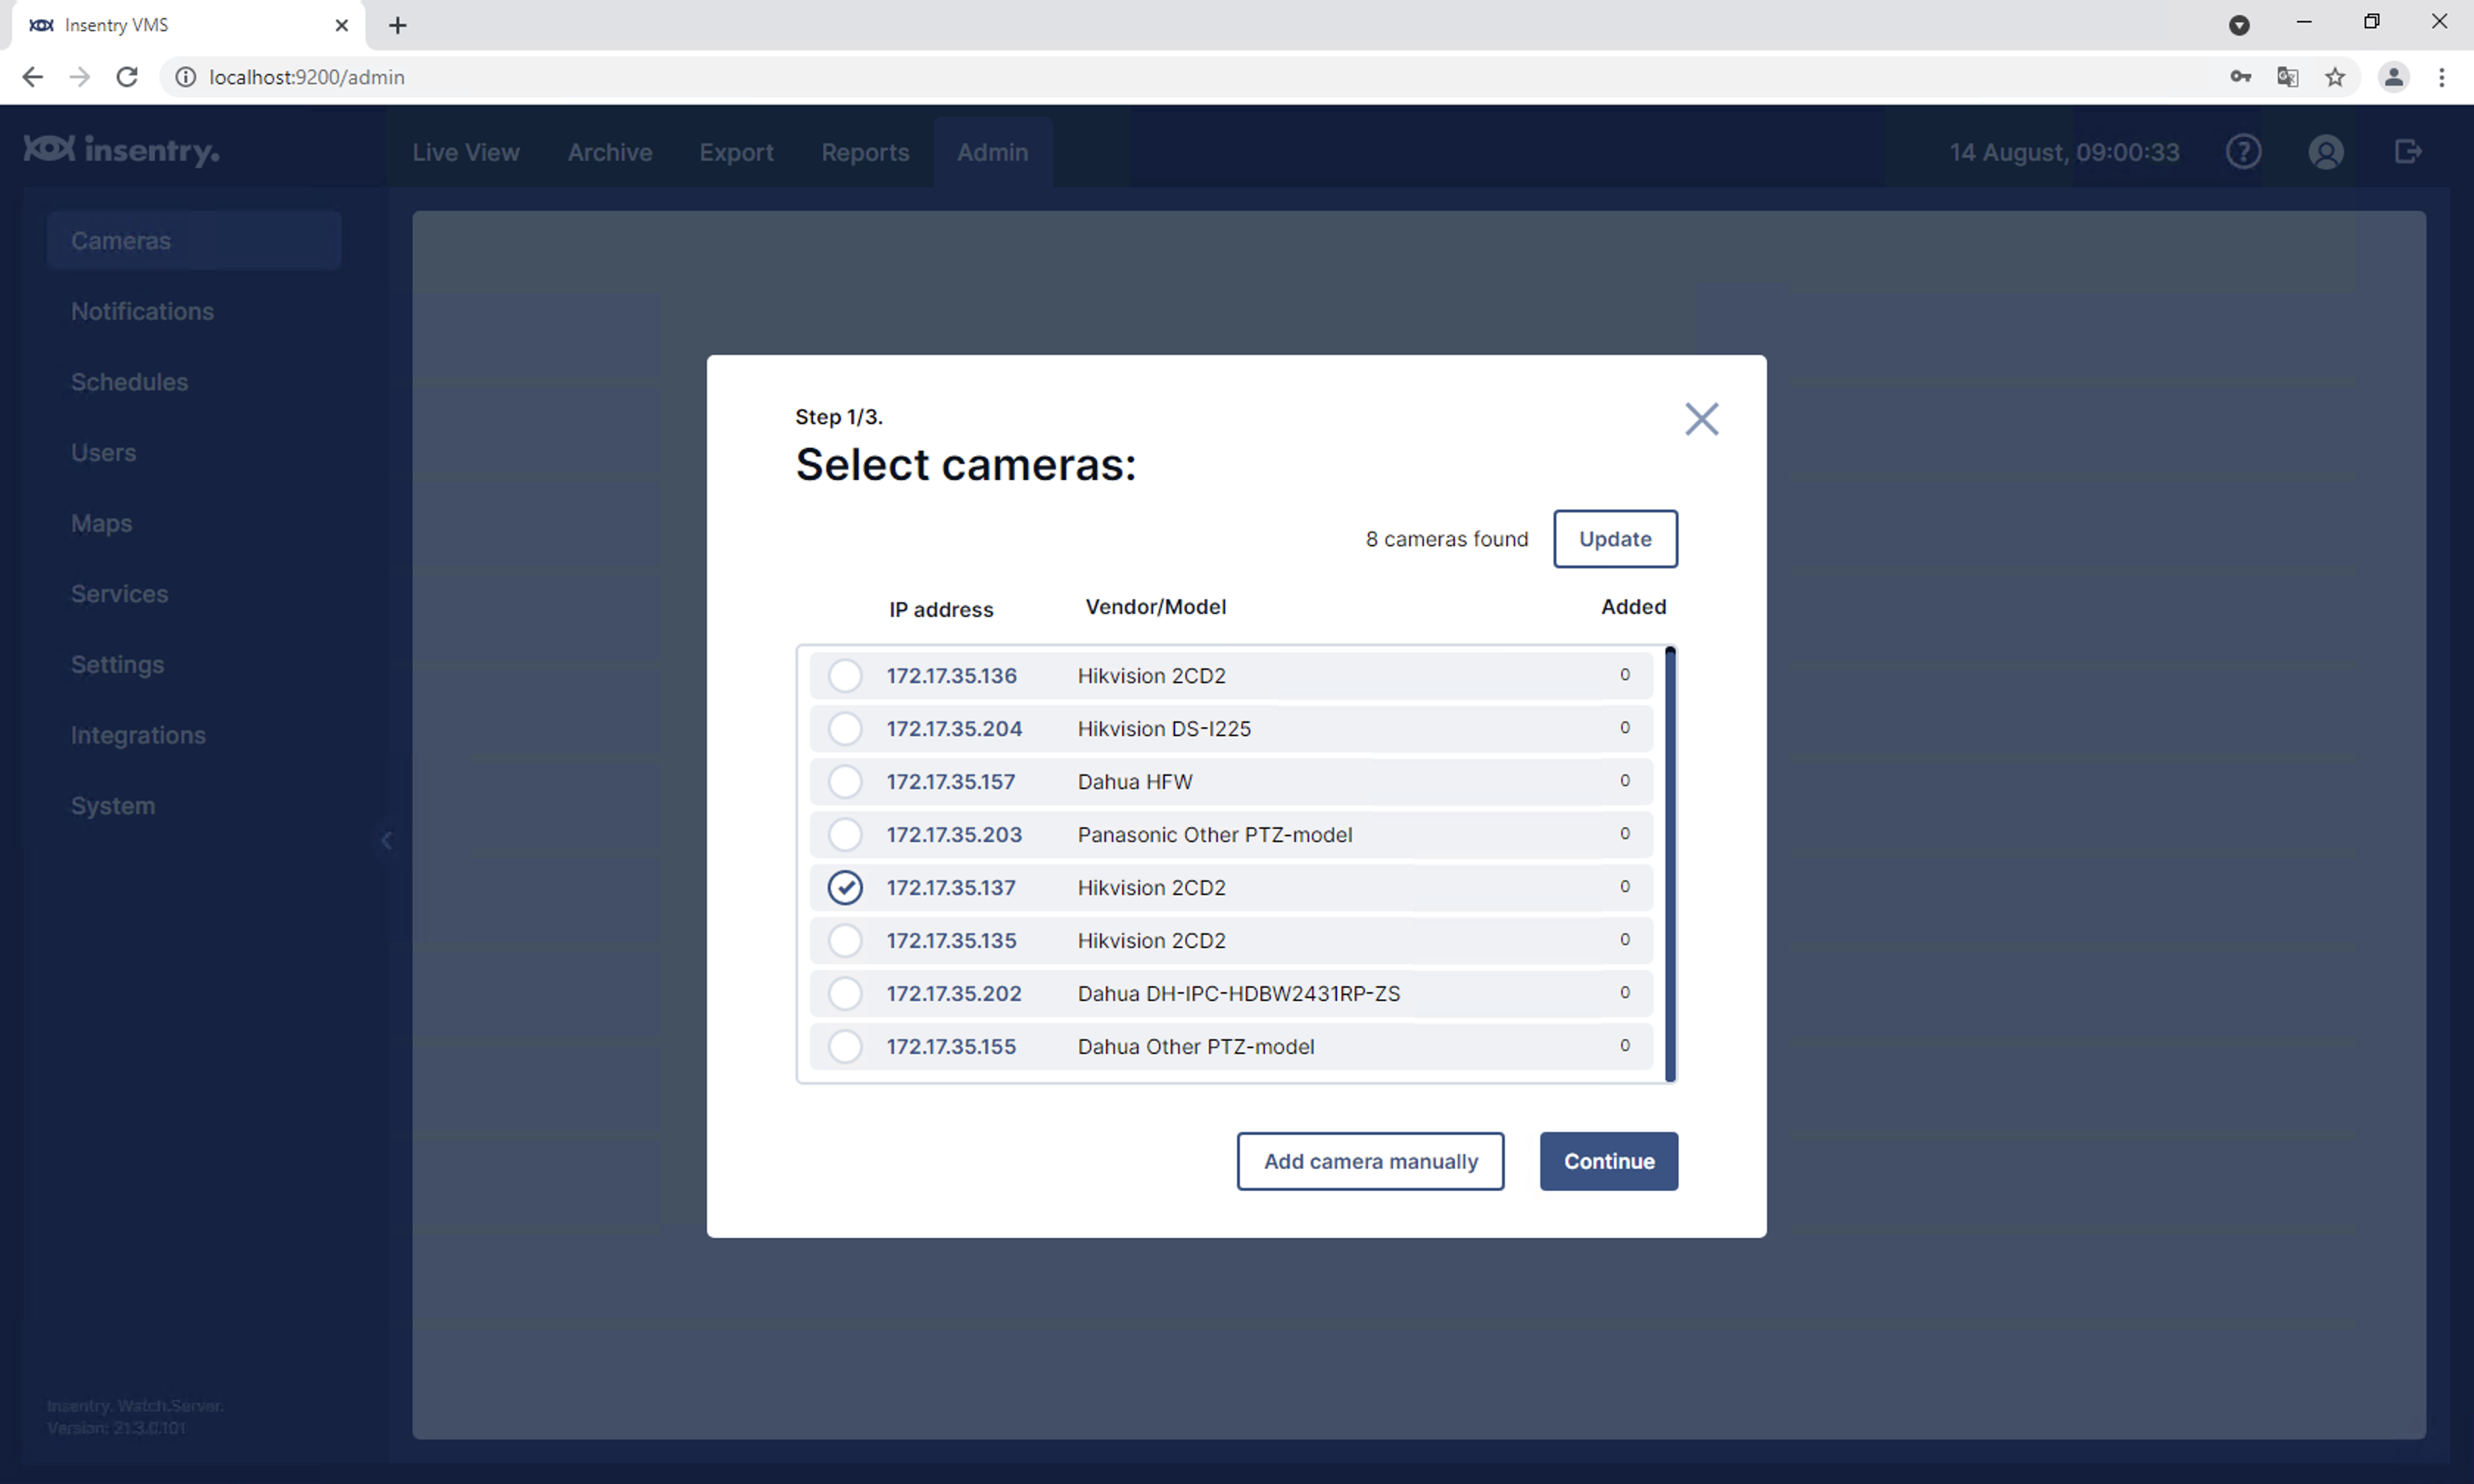
Adding cameras to software
Insentry Watch service automatically discovers available IP cameras in your local network using ONVIF protocol and broadcast queries.
You can select discovered camera from list or configure camera manually (for example if camera connected to global network or another subnet).
On the next step you have to set camera name, and configure username and password, that will be used to connect to camera.
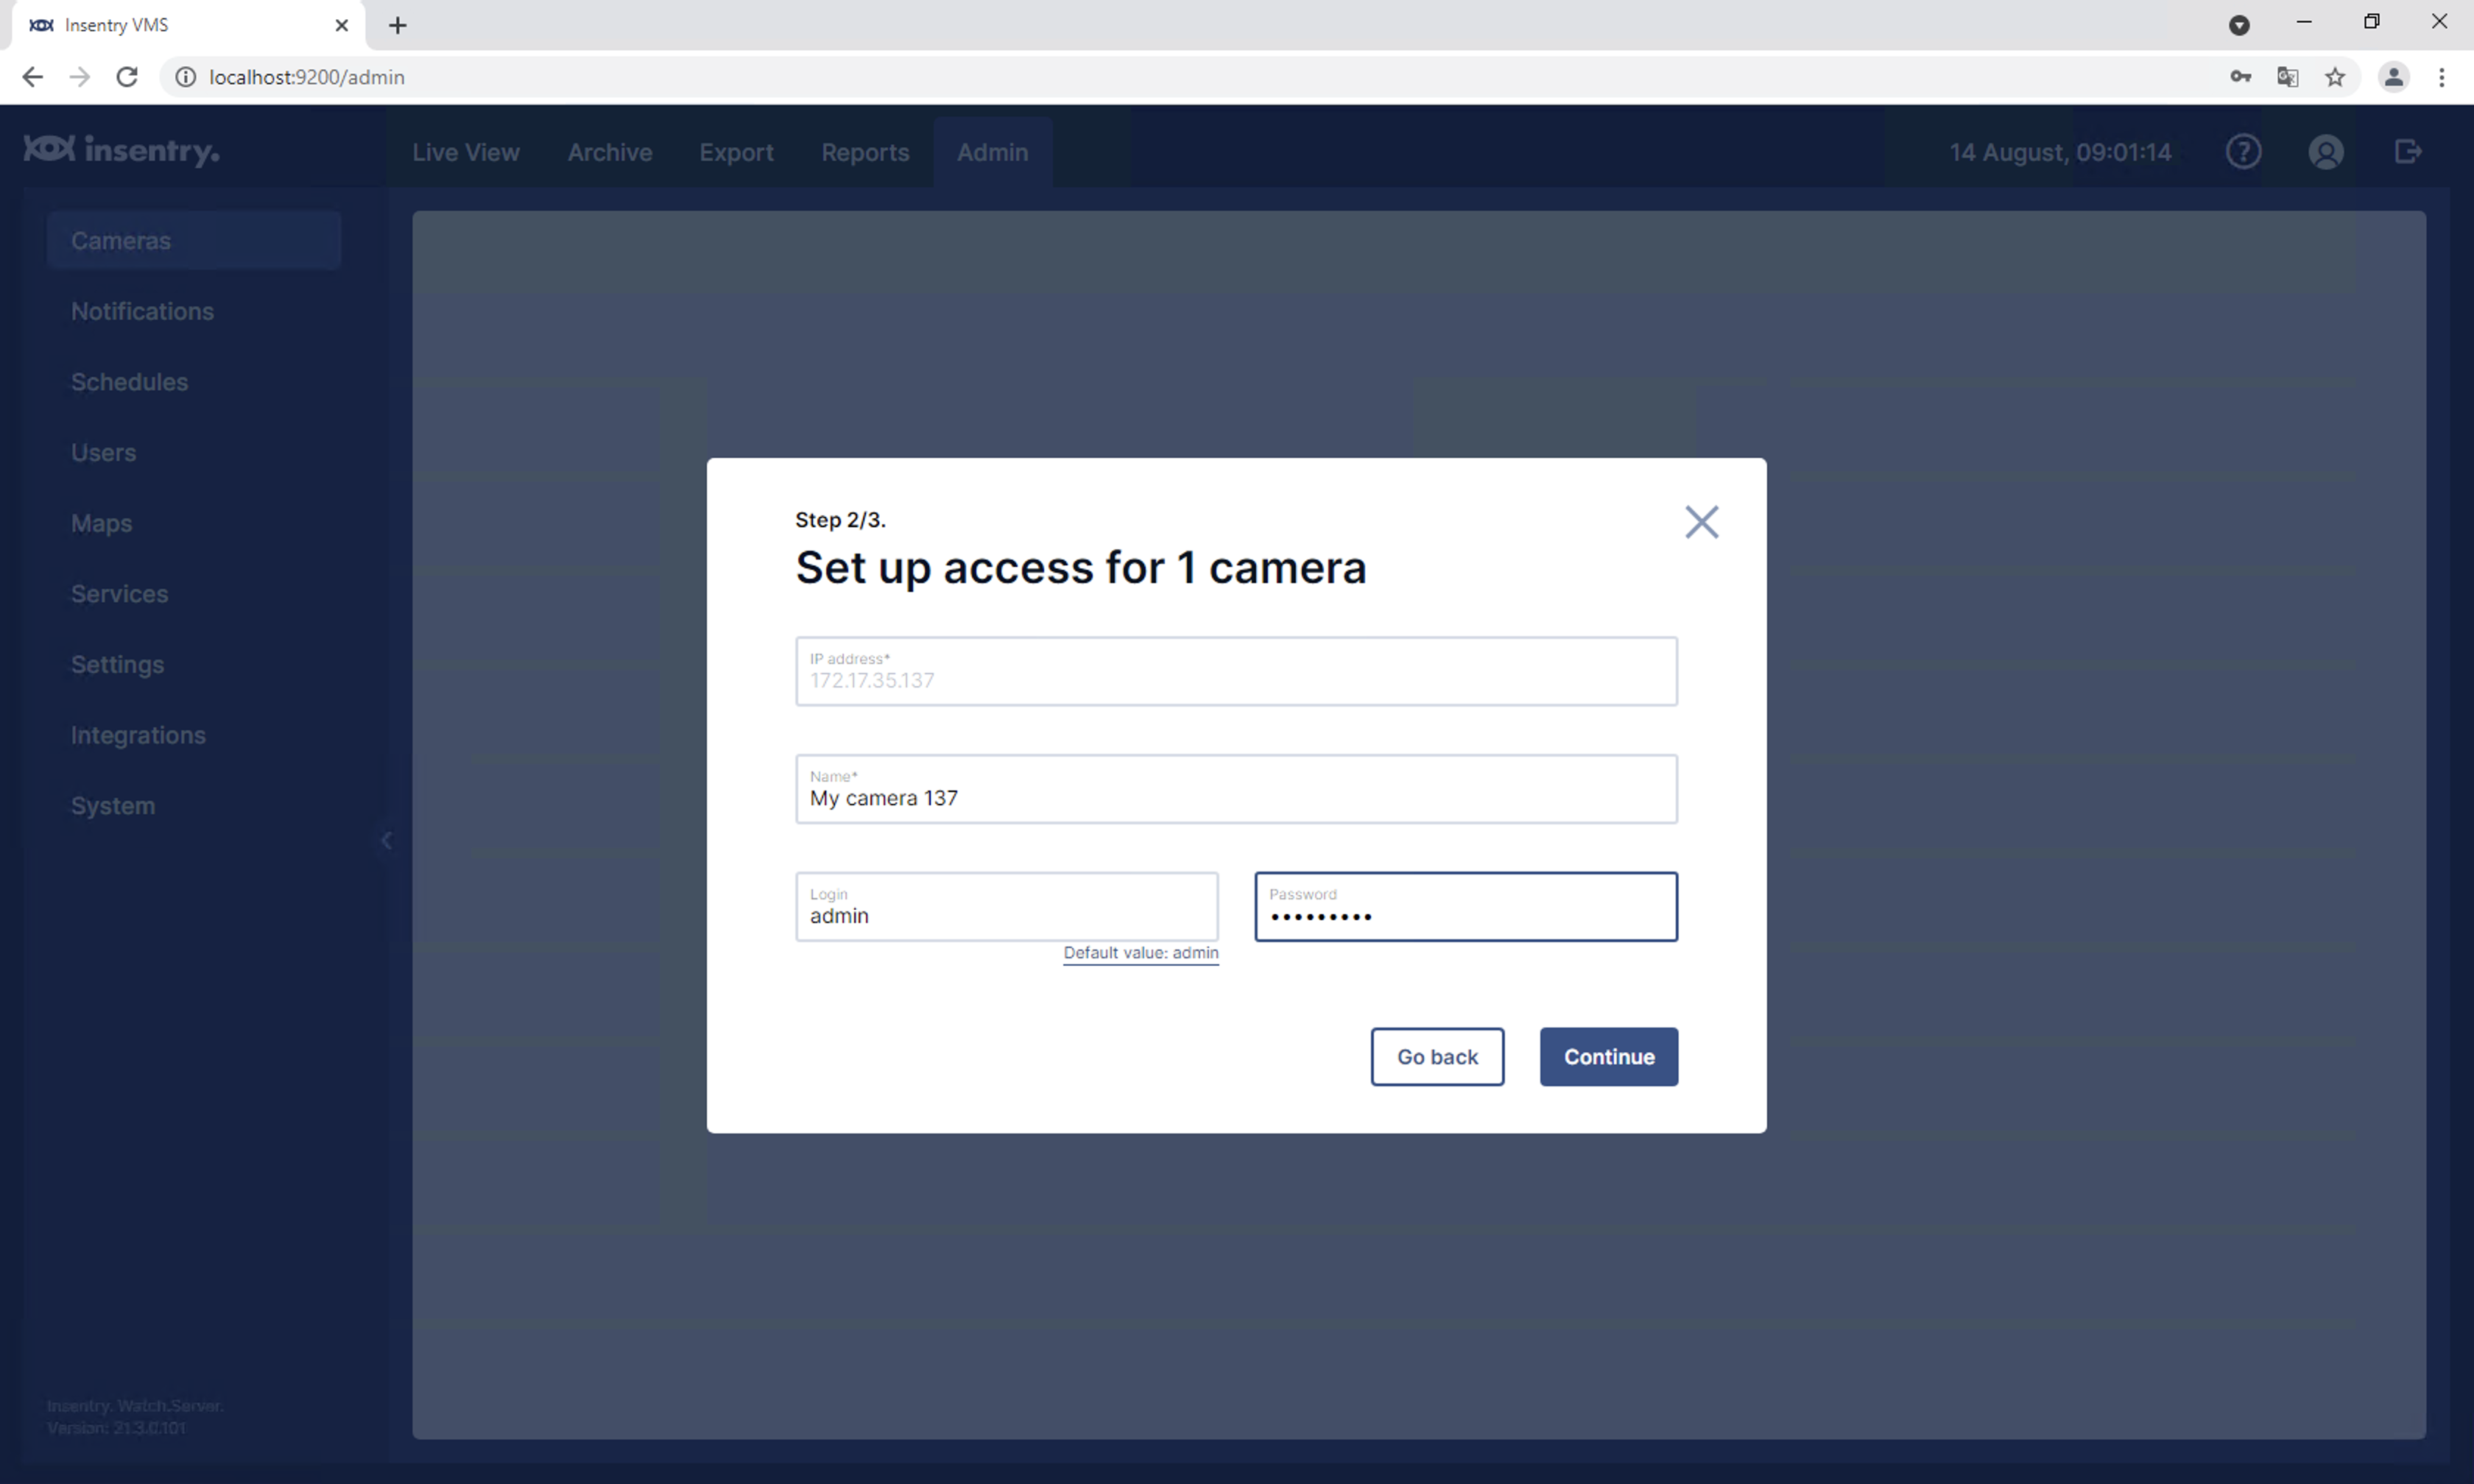
Camera will be added to Cameras list.
Storage configuration
By default Insentry software creates storage for archive on system drive with size of 30GB.
You can add custom folder or drive to store video recordings.
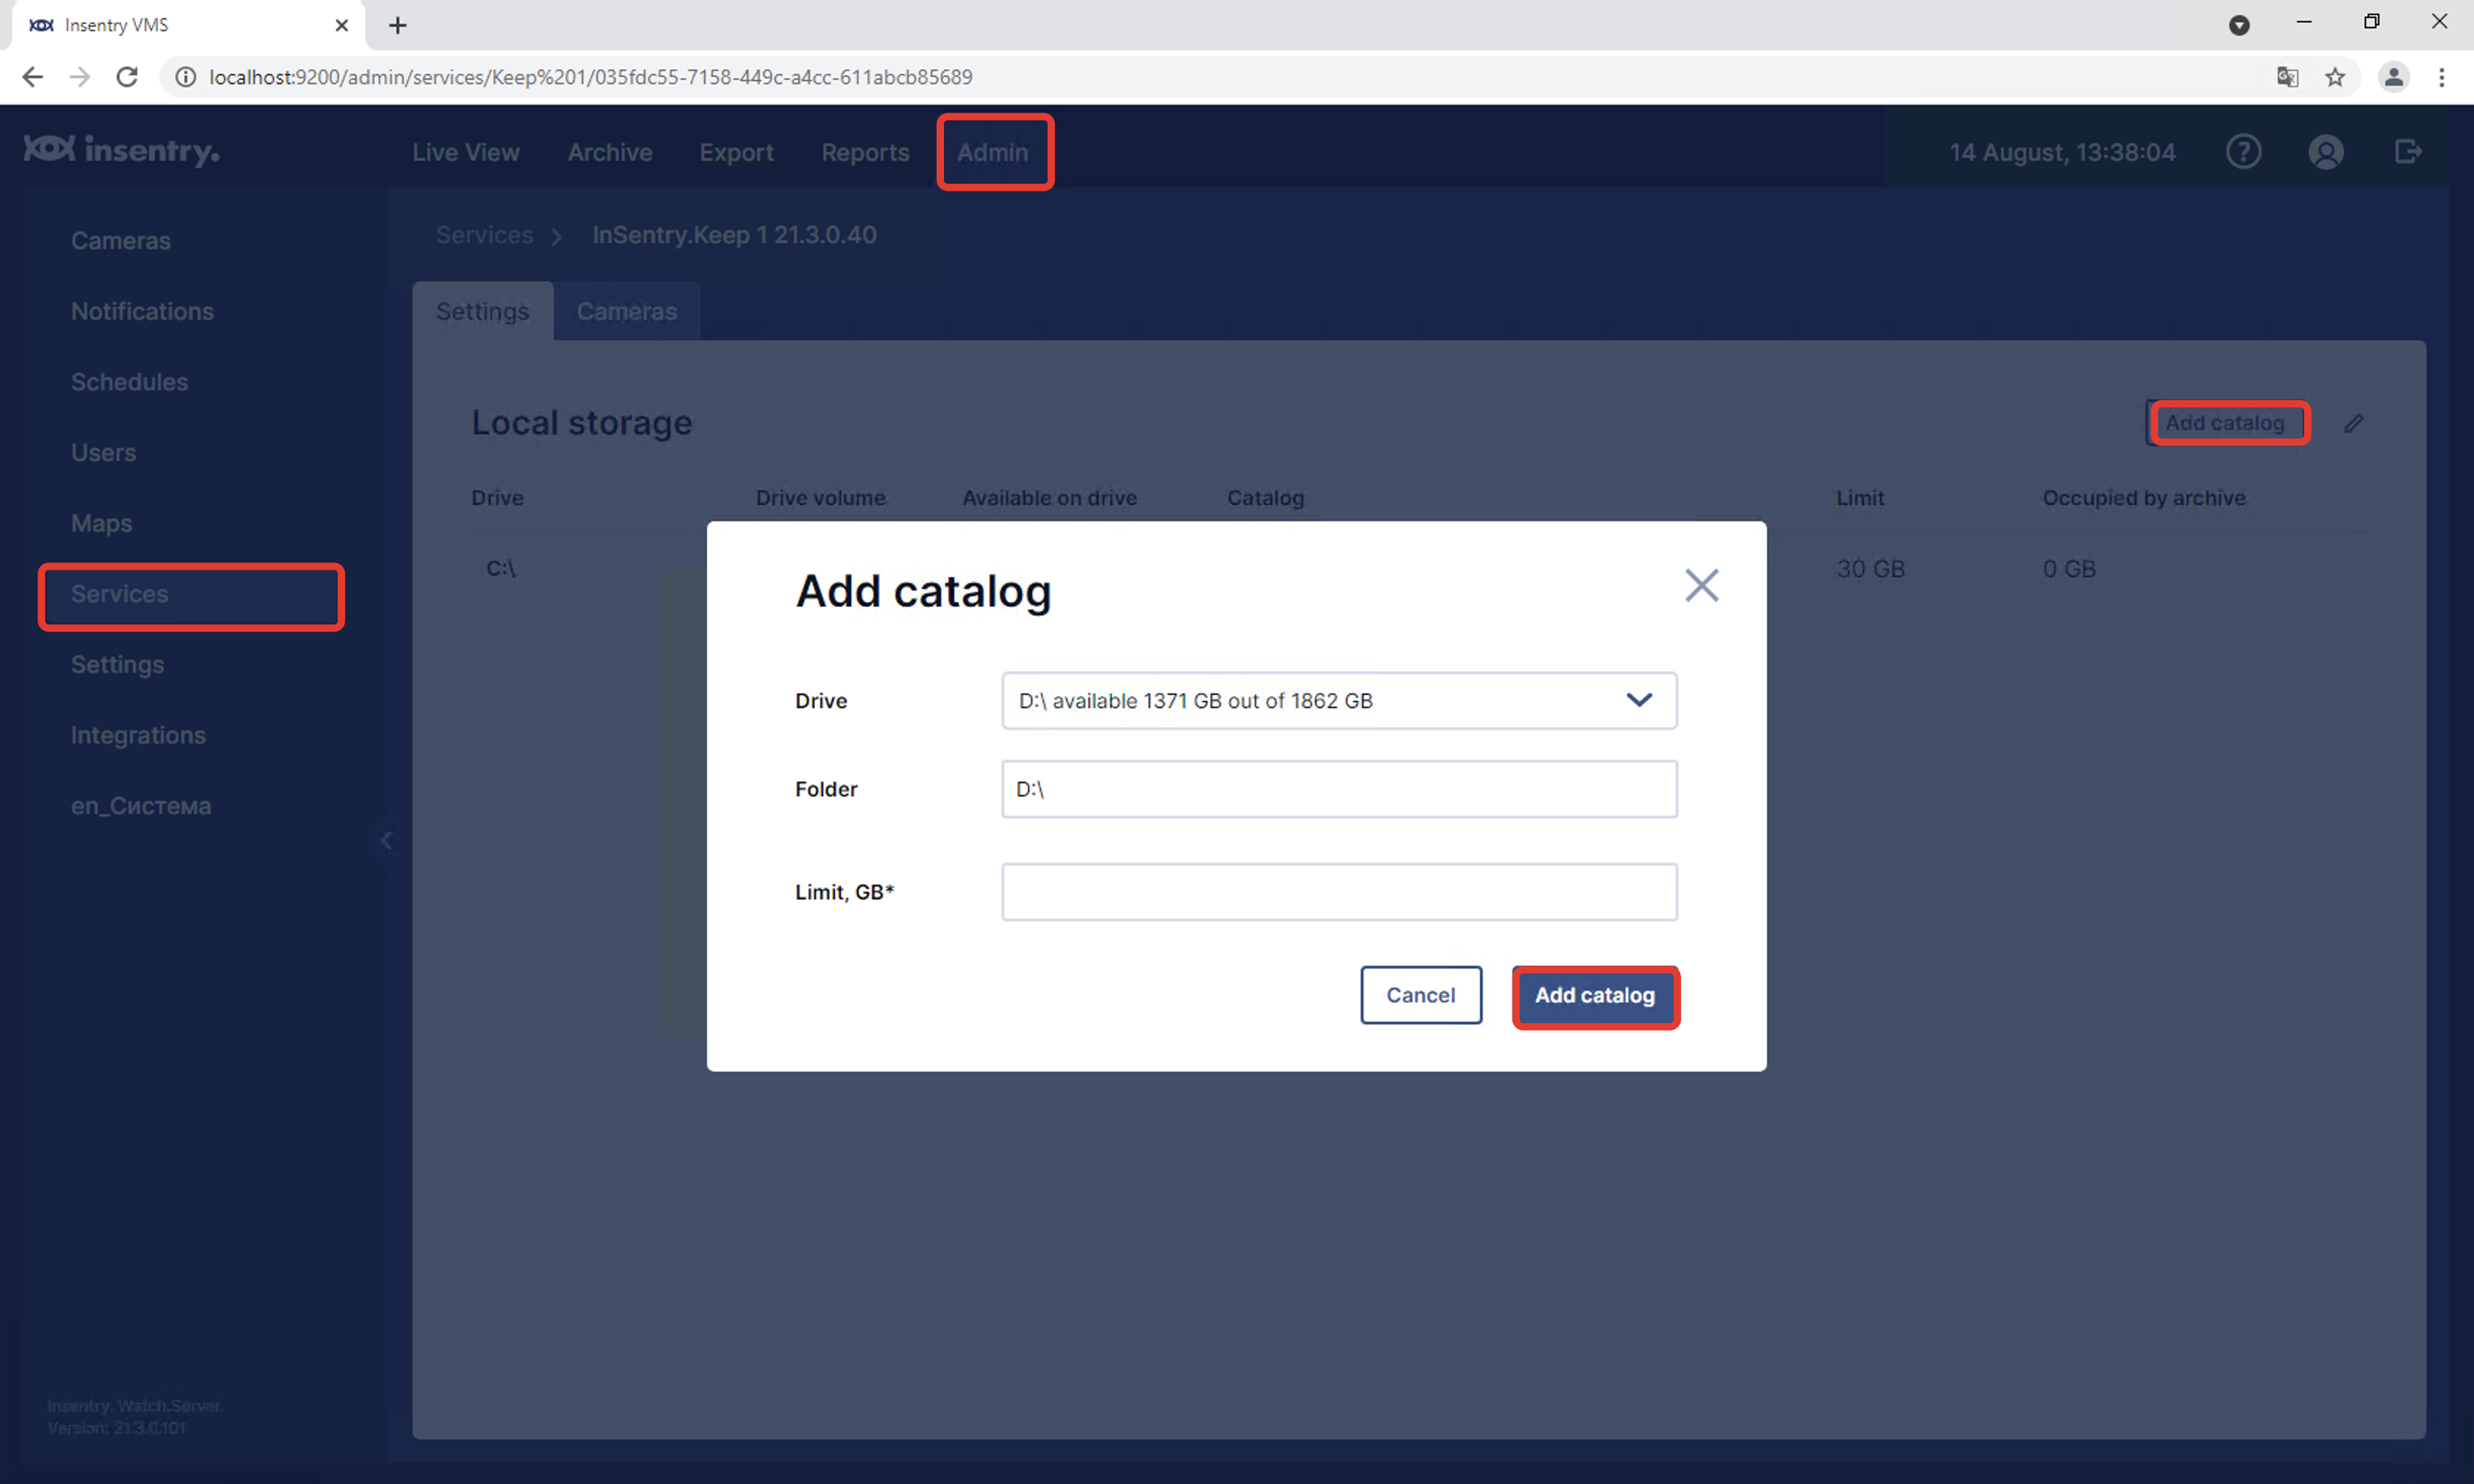
To configure and organize storage:
- Navigate to Admin tab.
- Select Services on left pane.
- Click Insentry.Keep 1 service.
- On Settings tab click Add catalog.
- Select target drive for storage and set storage limit in GB.
Camera configuration
Recording to archive
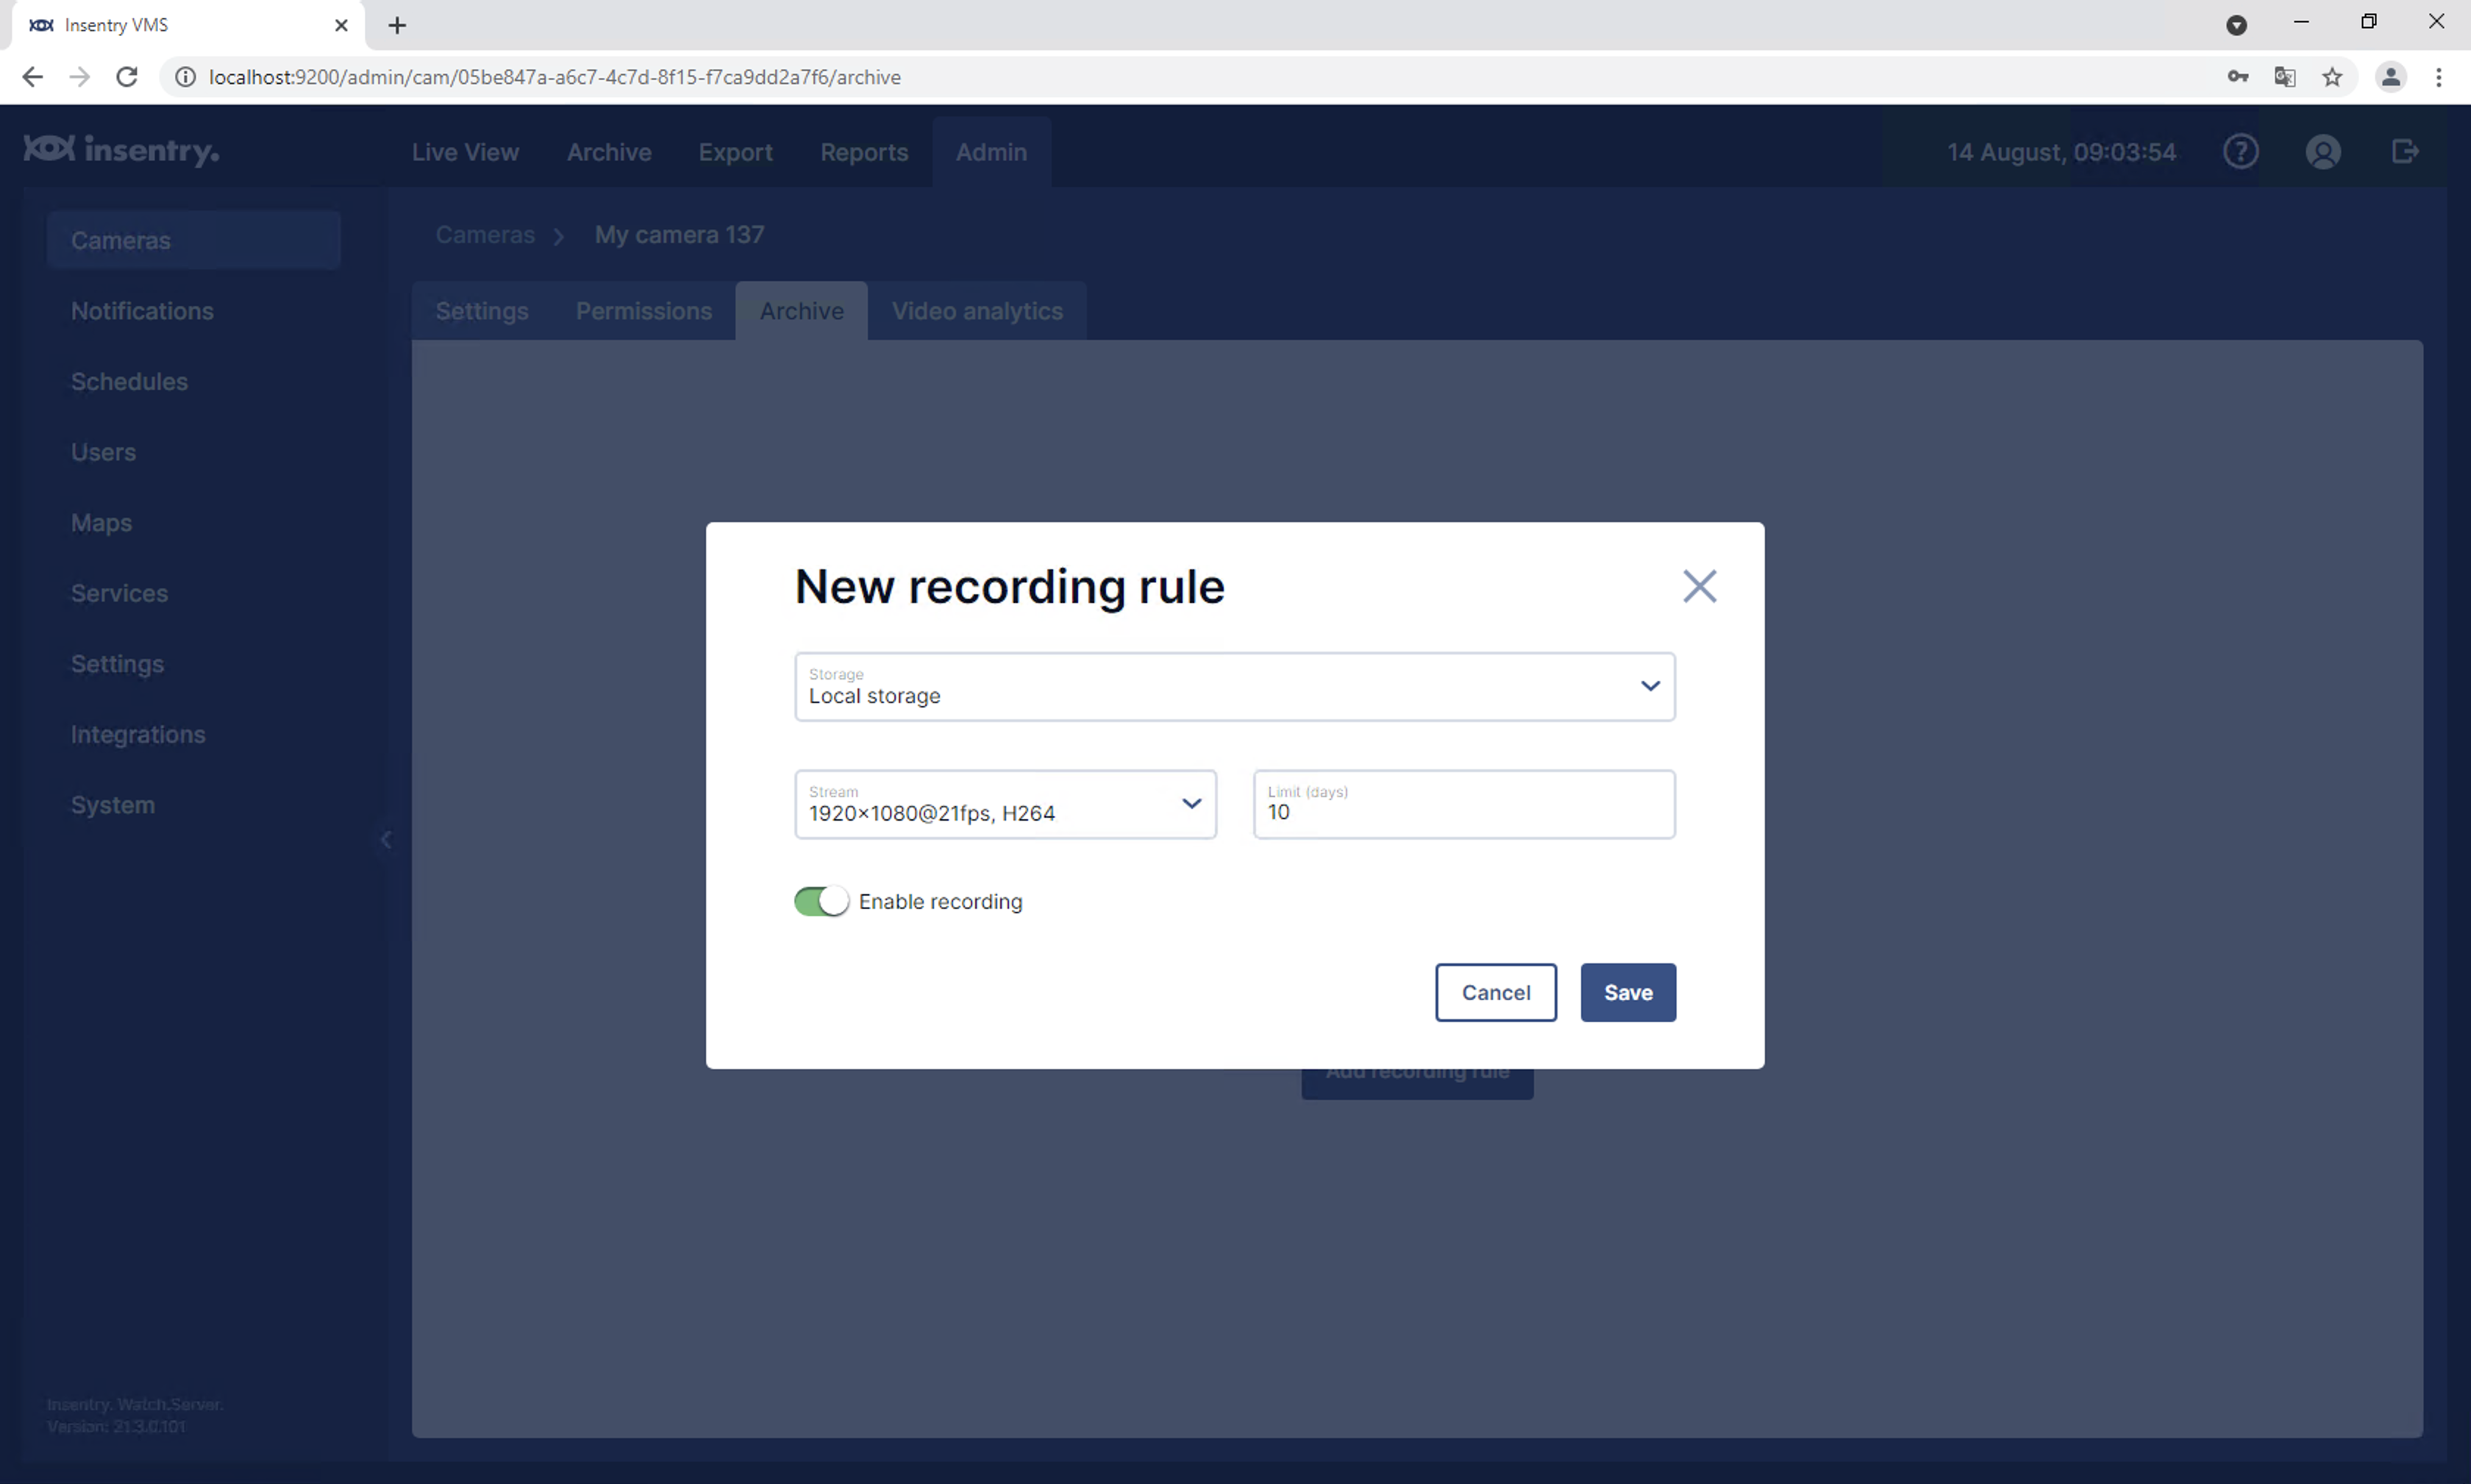
- Select Camera in Cameras screen.
- Move to Archive tab of Camera settings.
- Click Add recording rule.
- Enable toggle to start recording immediately and press Save.

Video analytics
To use Videon analytics detectors you have to install nVidia GPU in server (GTX 1660 6G or faster).
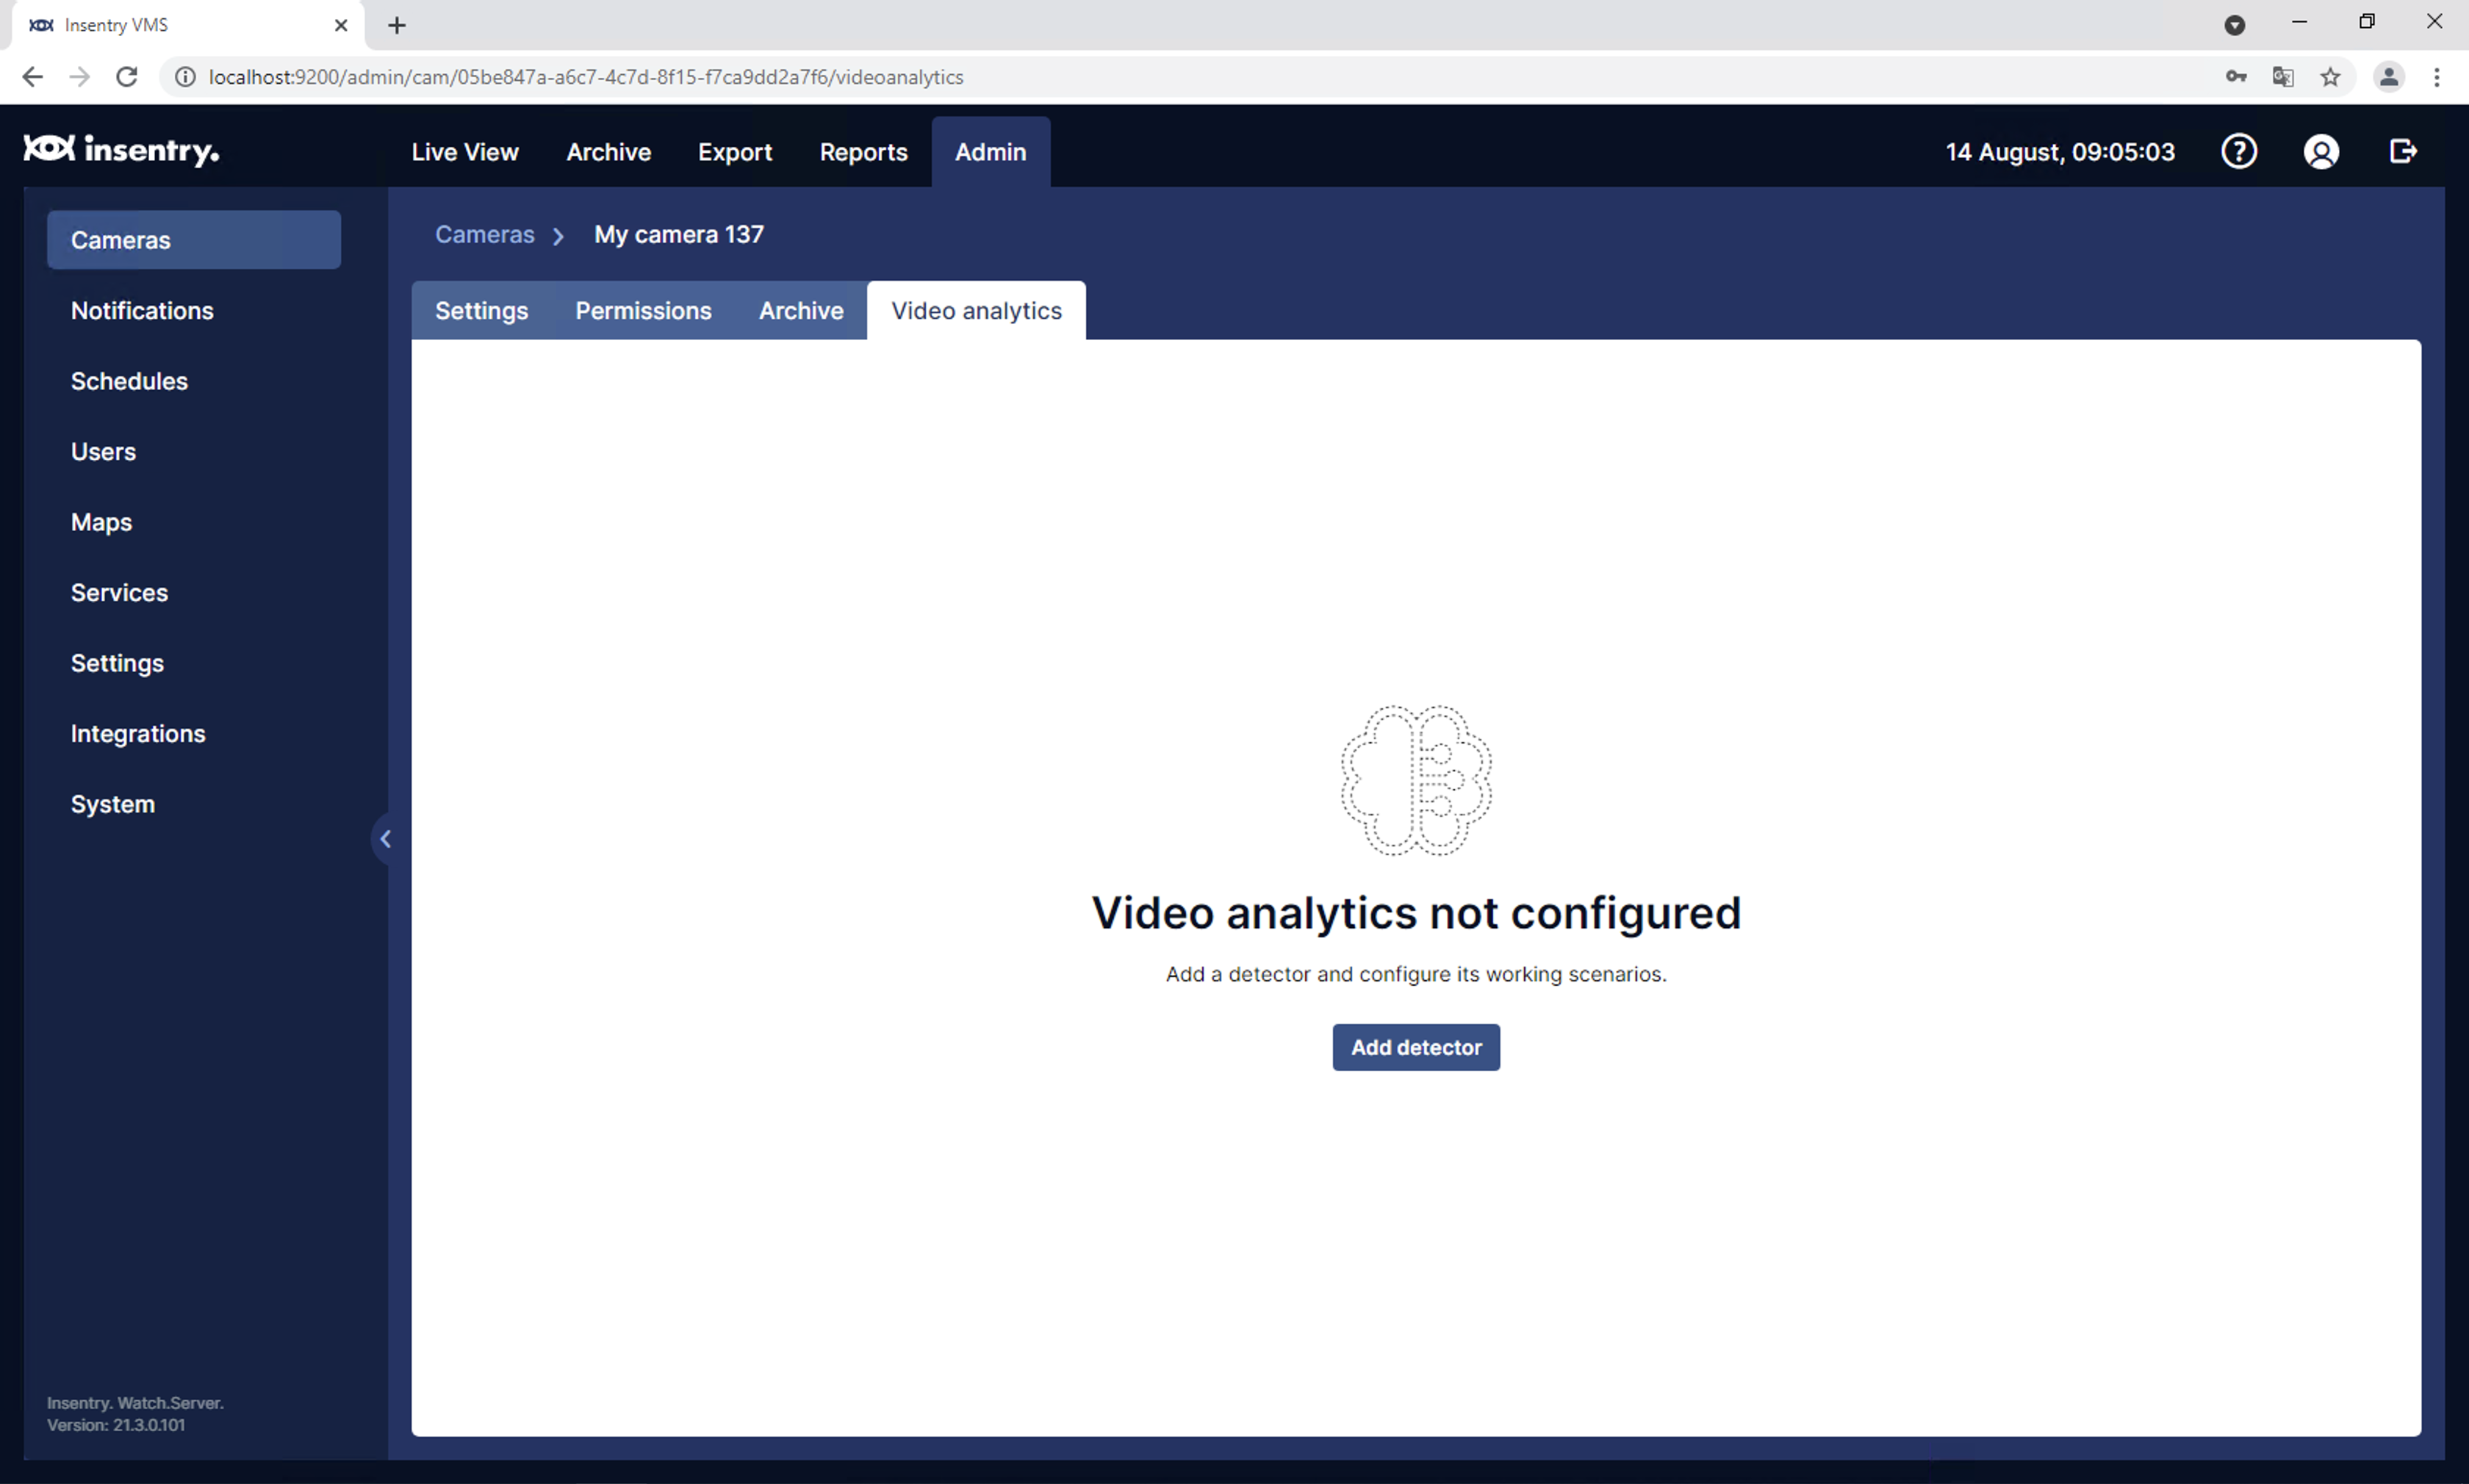
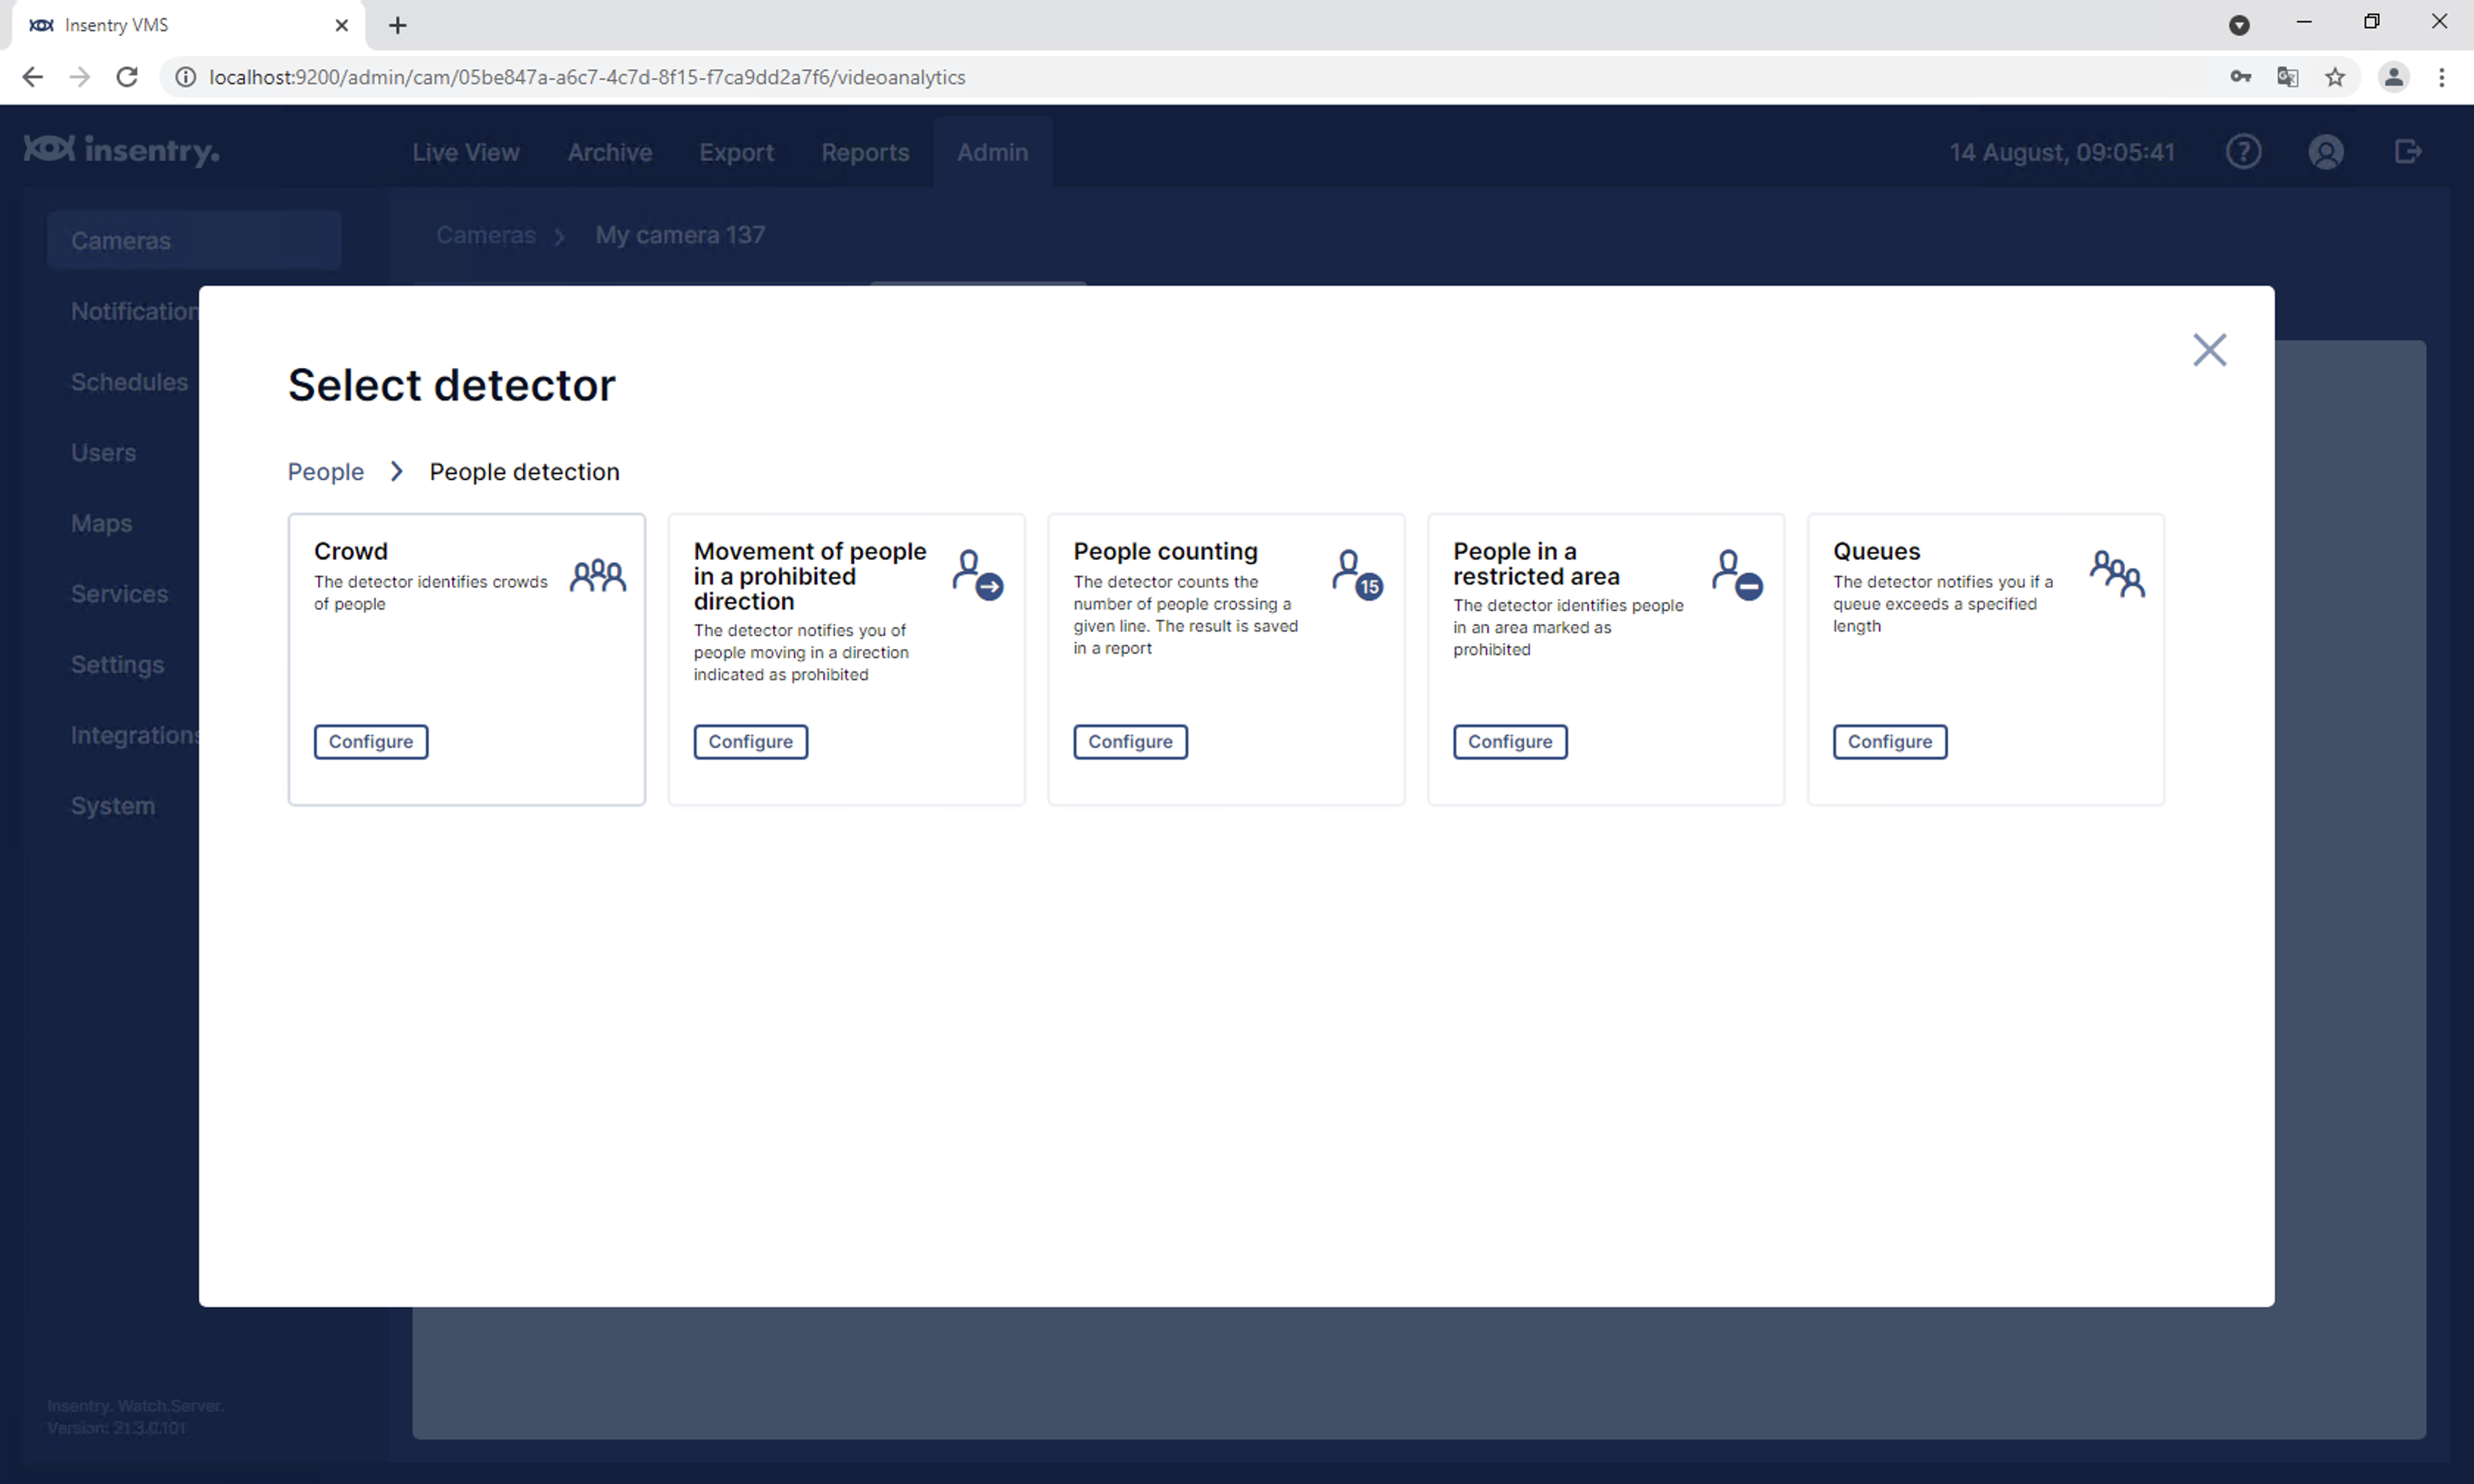
- Navigate to Video analytics tab of a Camera.
- Click Add detector.
- Select target type of detector, and click a tile.
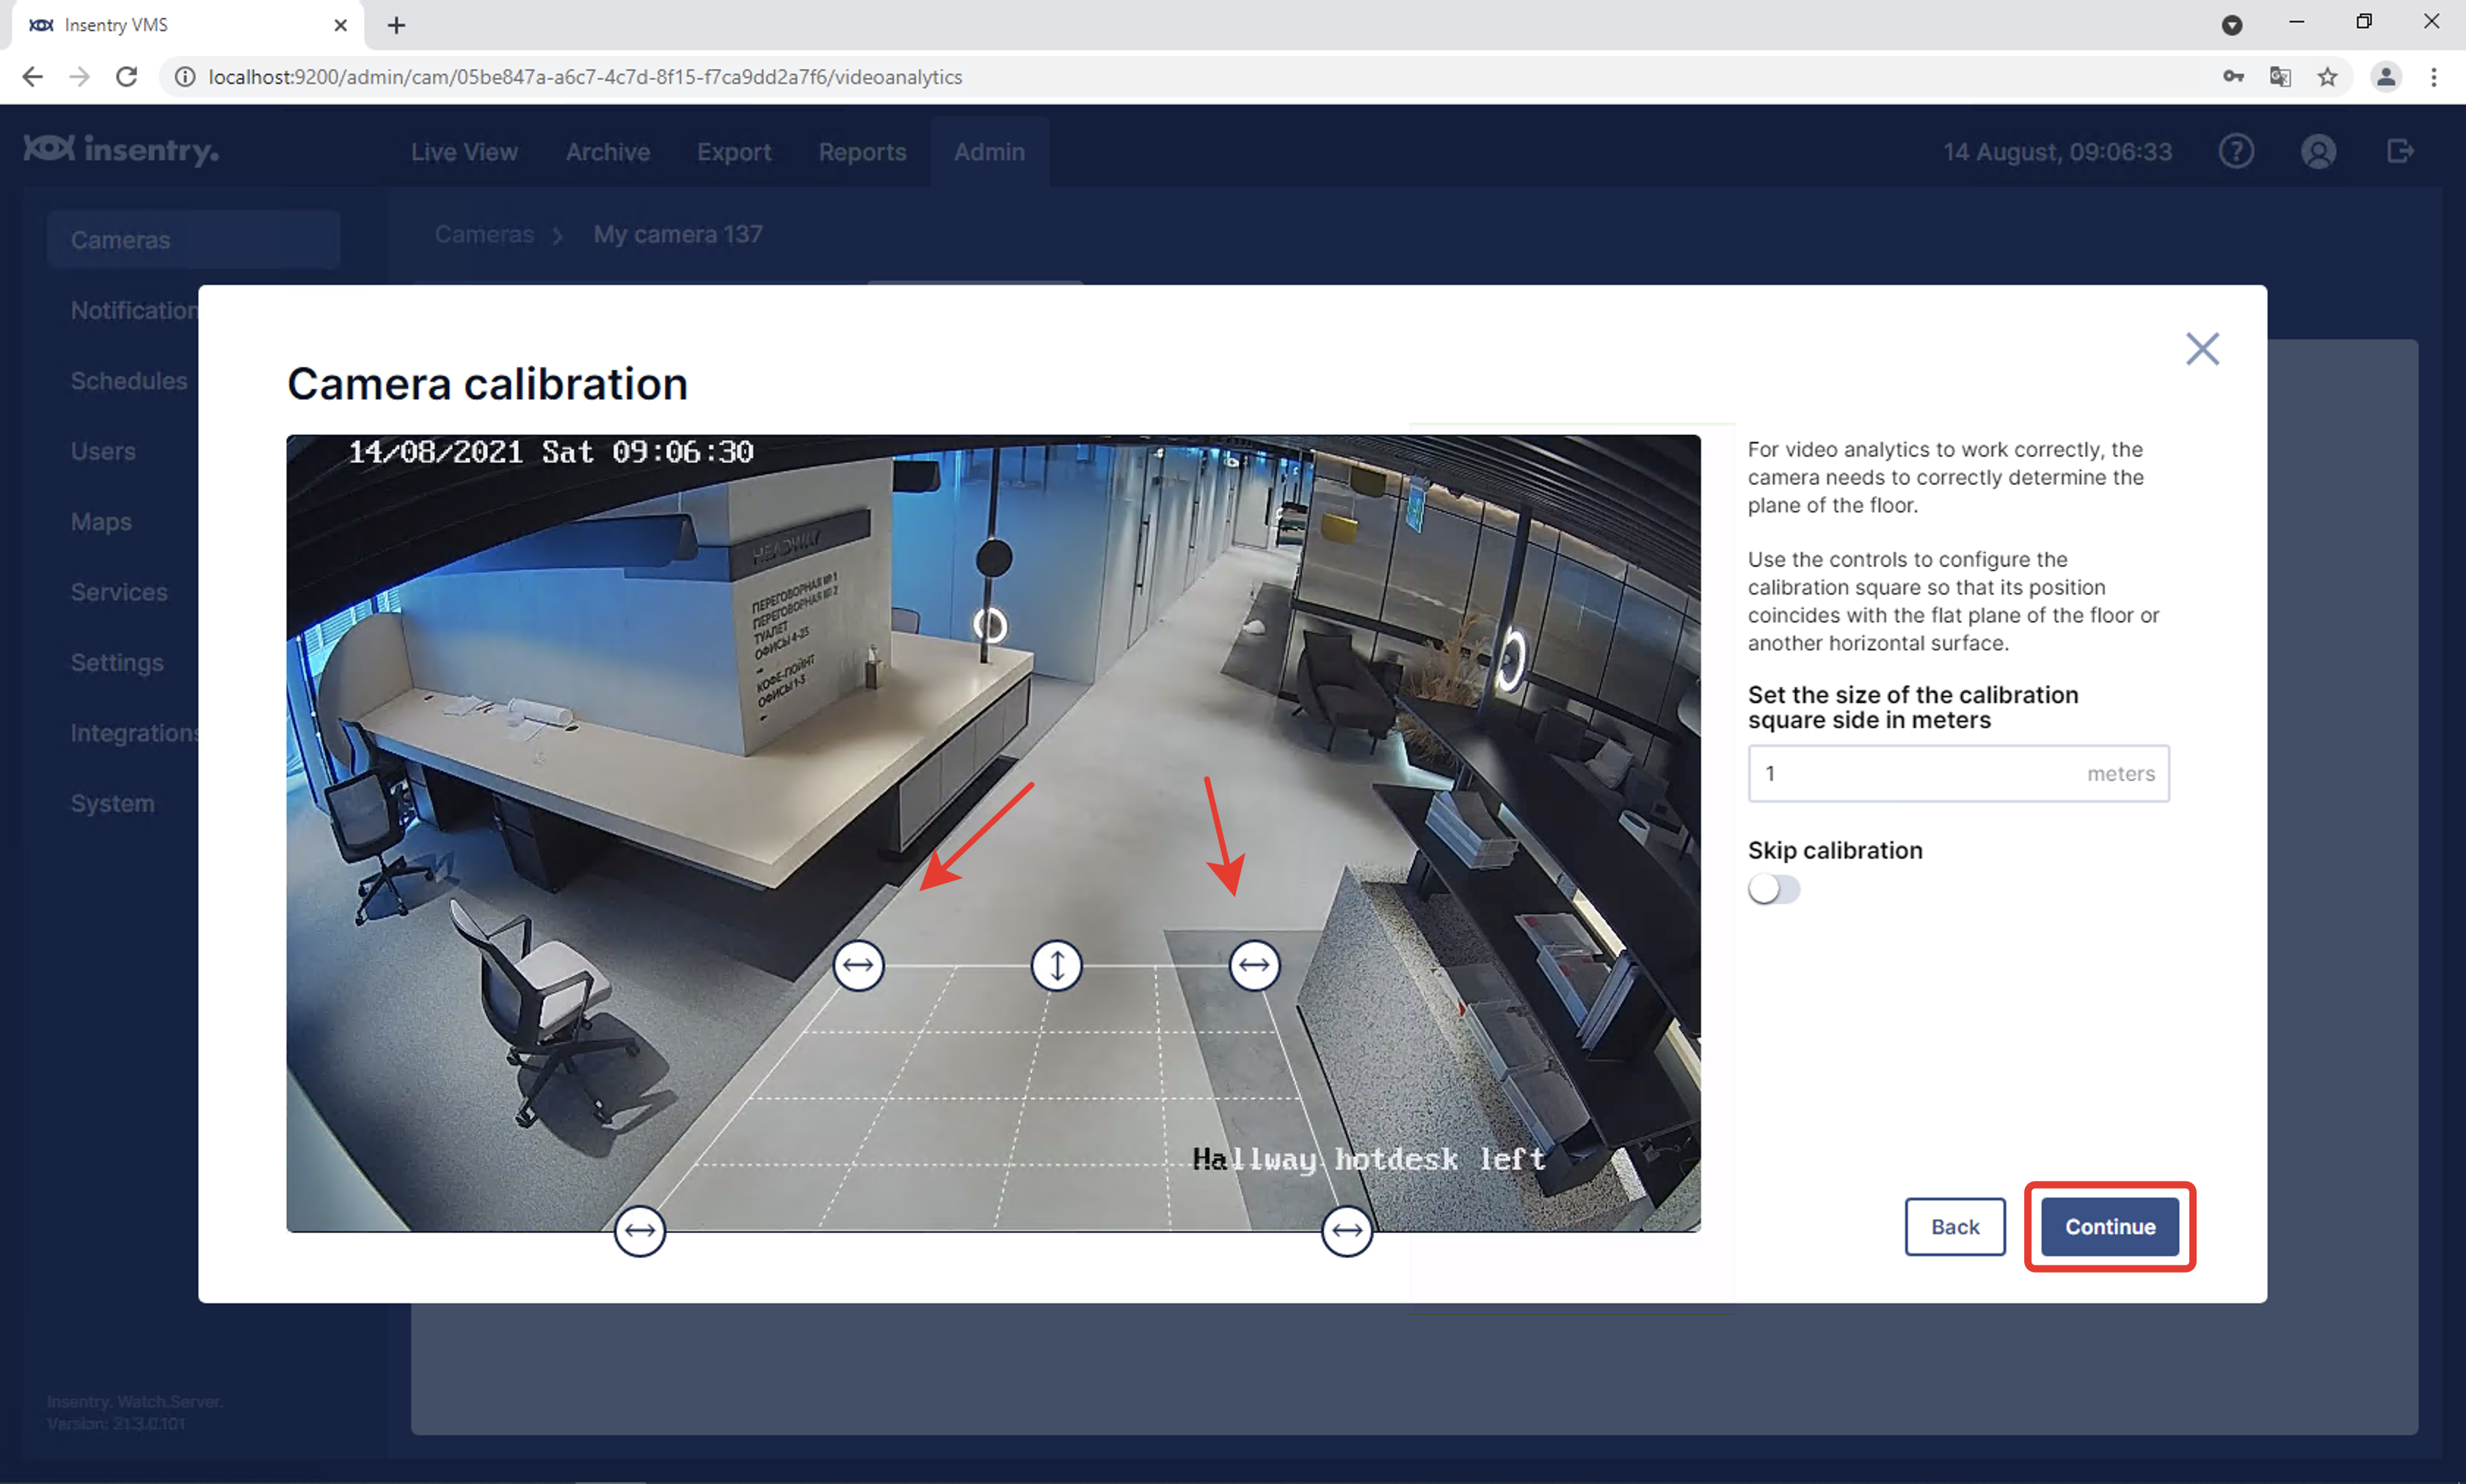
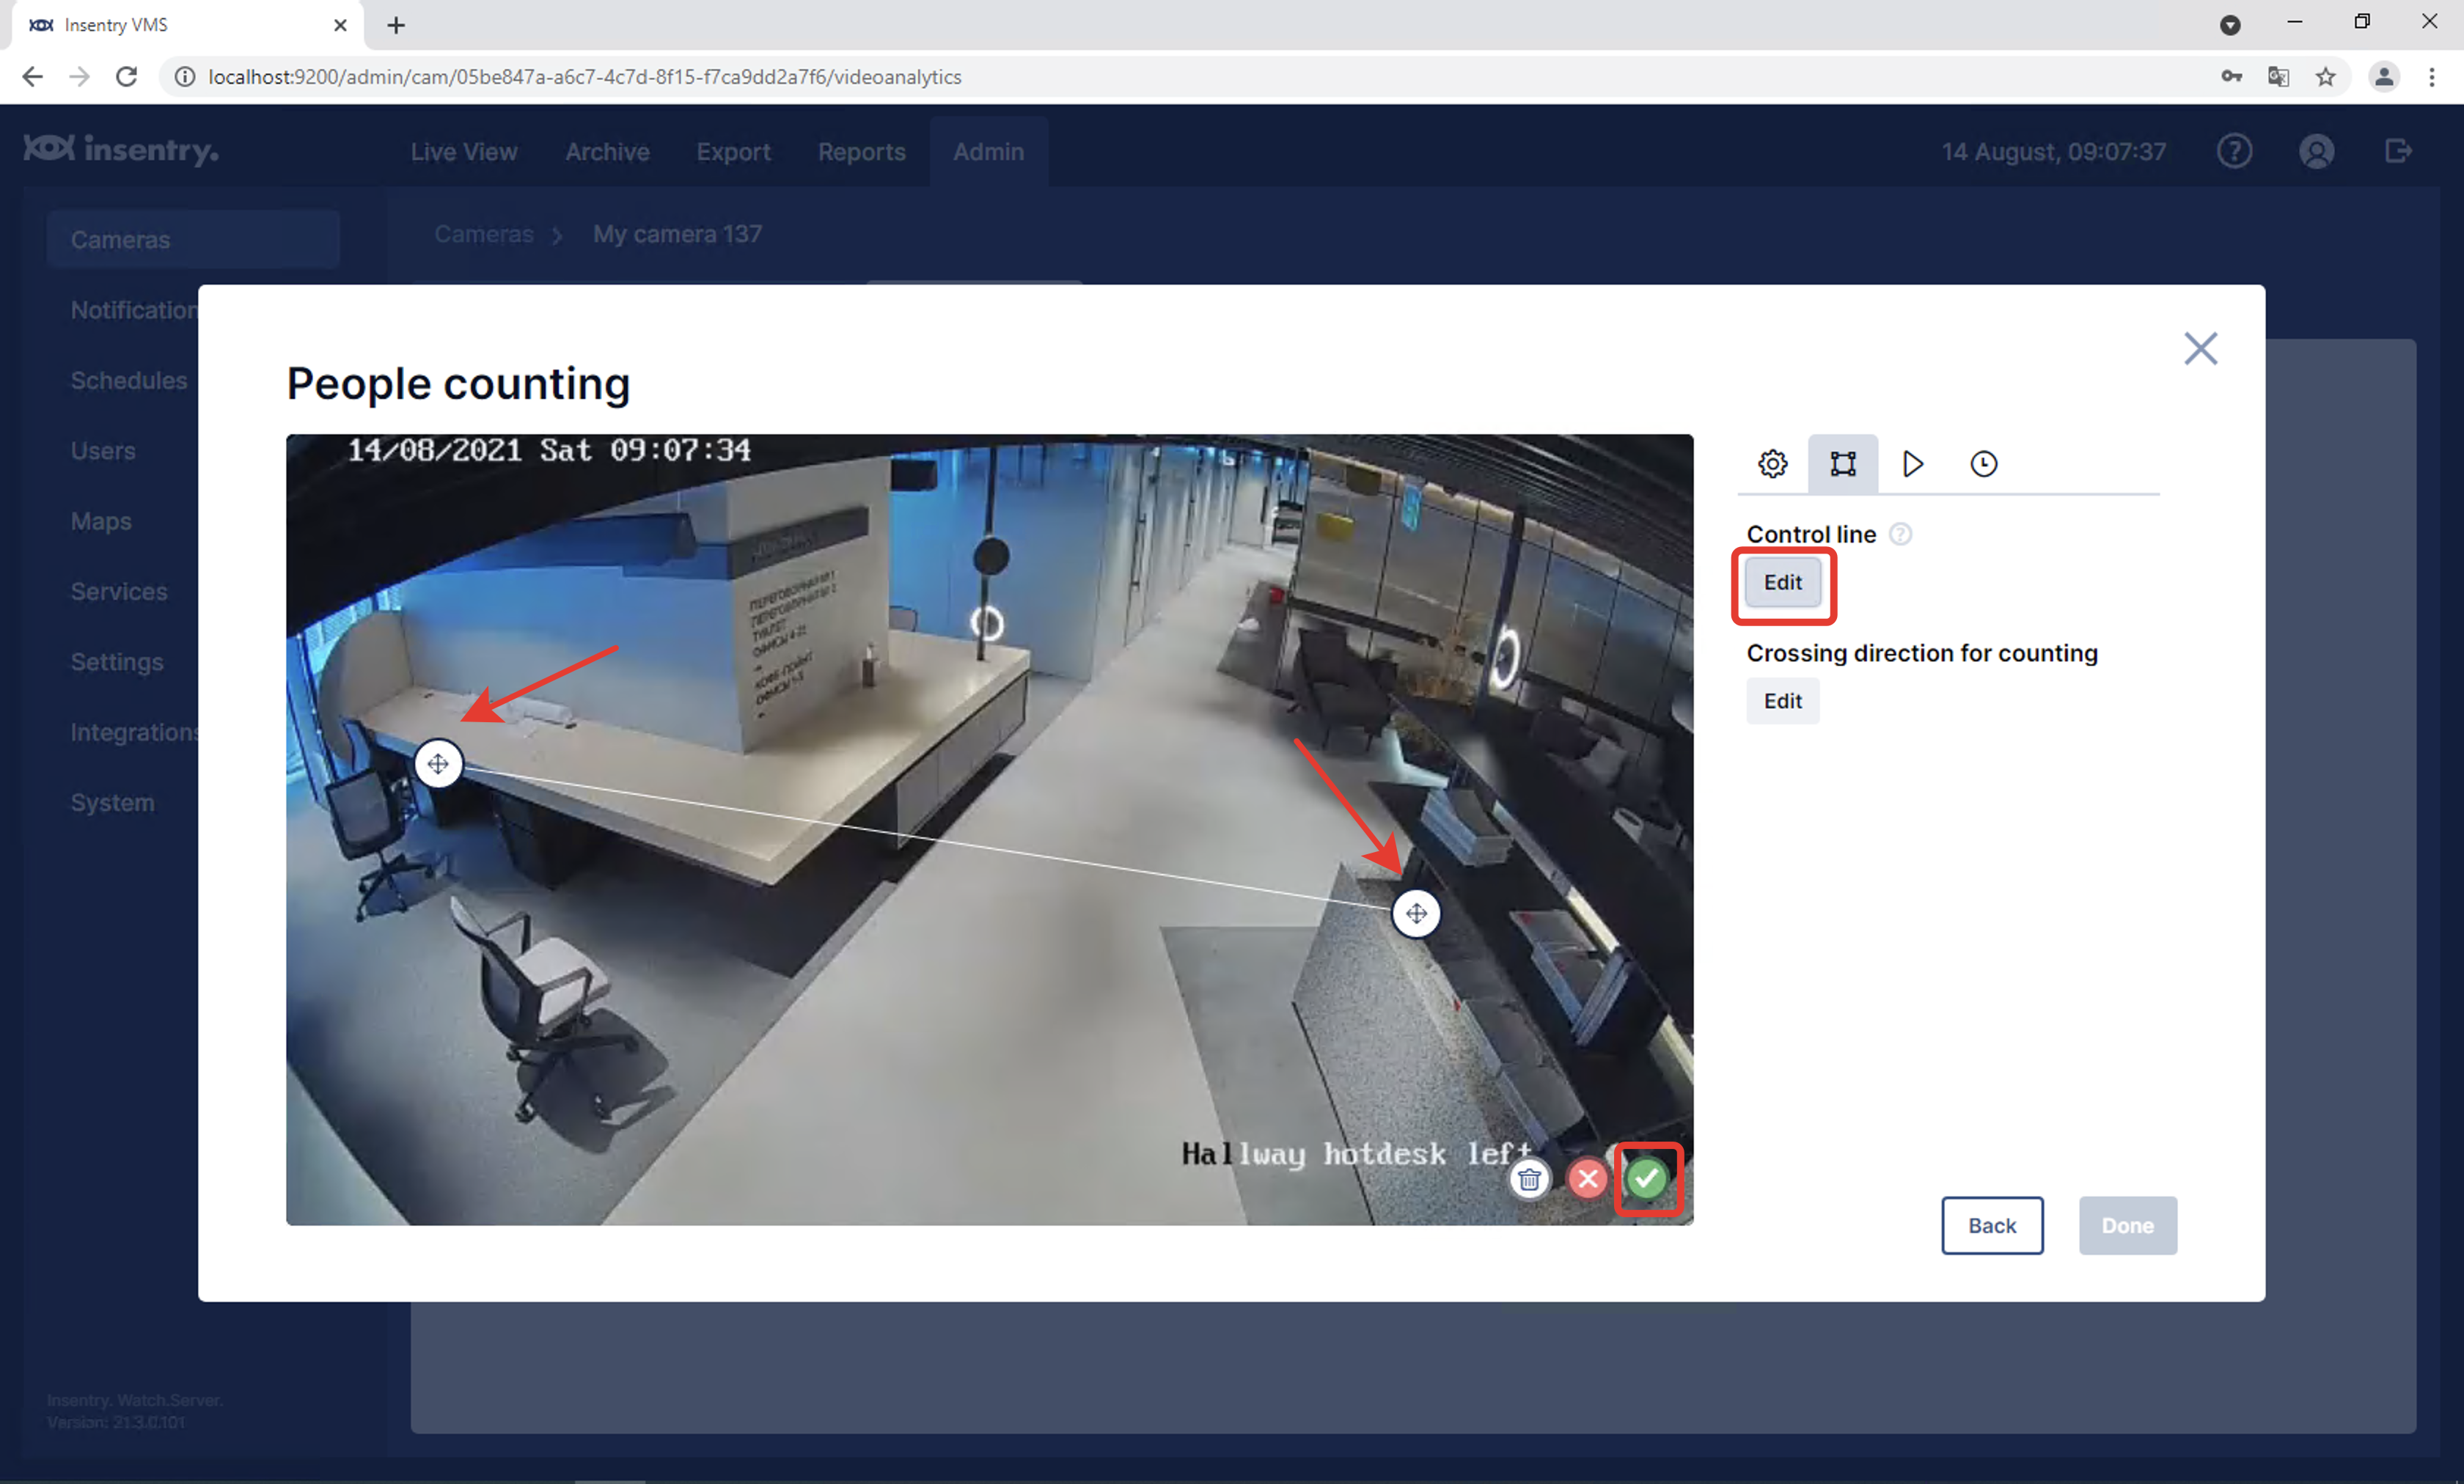
- Configure detector using master.
You can add multiple detectors to one camera using Add button.
It’s possible to start and stop already configured detectors using toggle (see last screenshot).

.png)
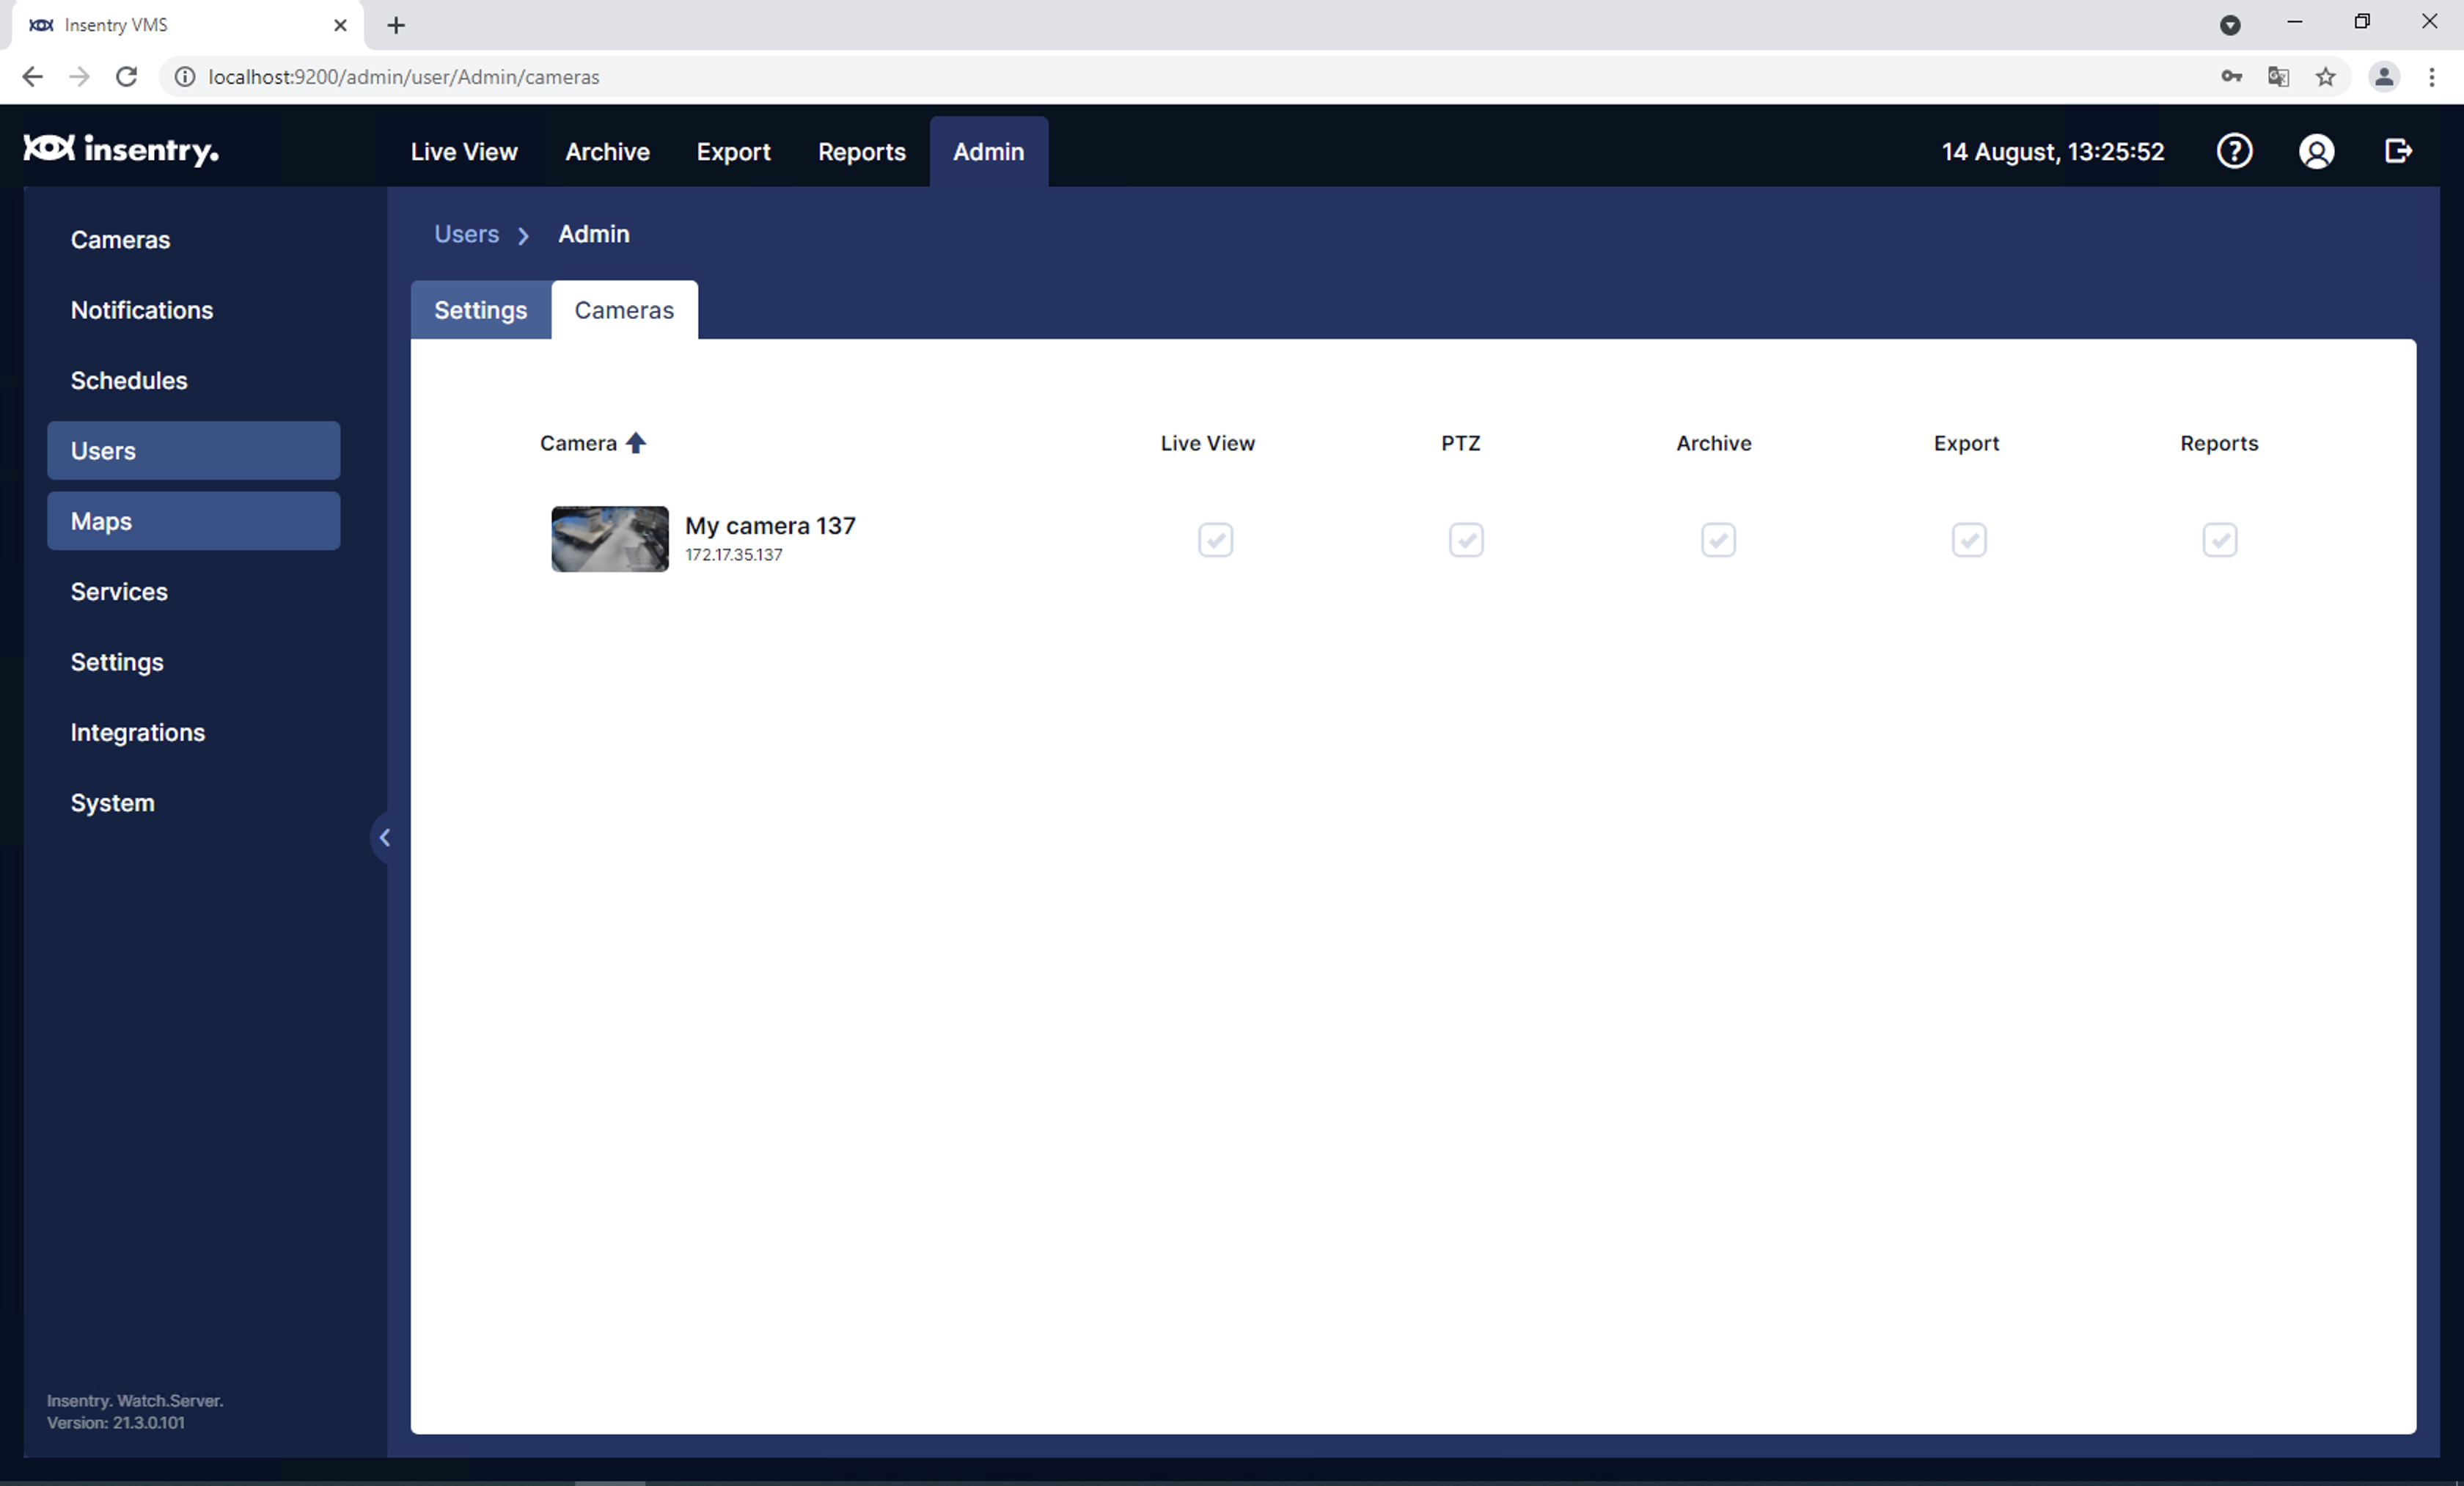
Adding users
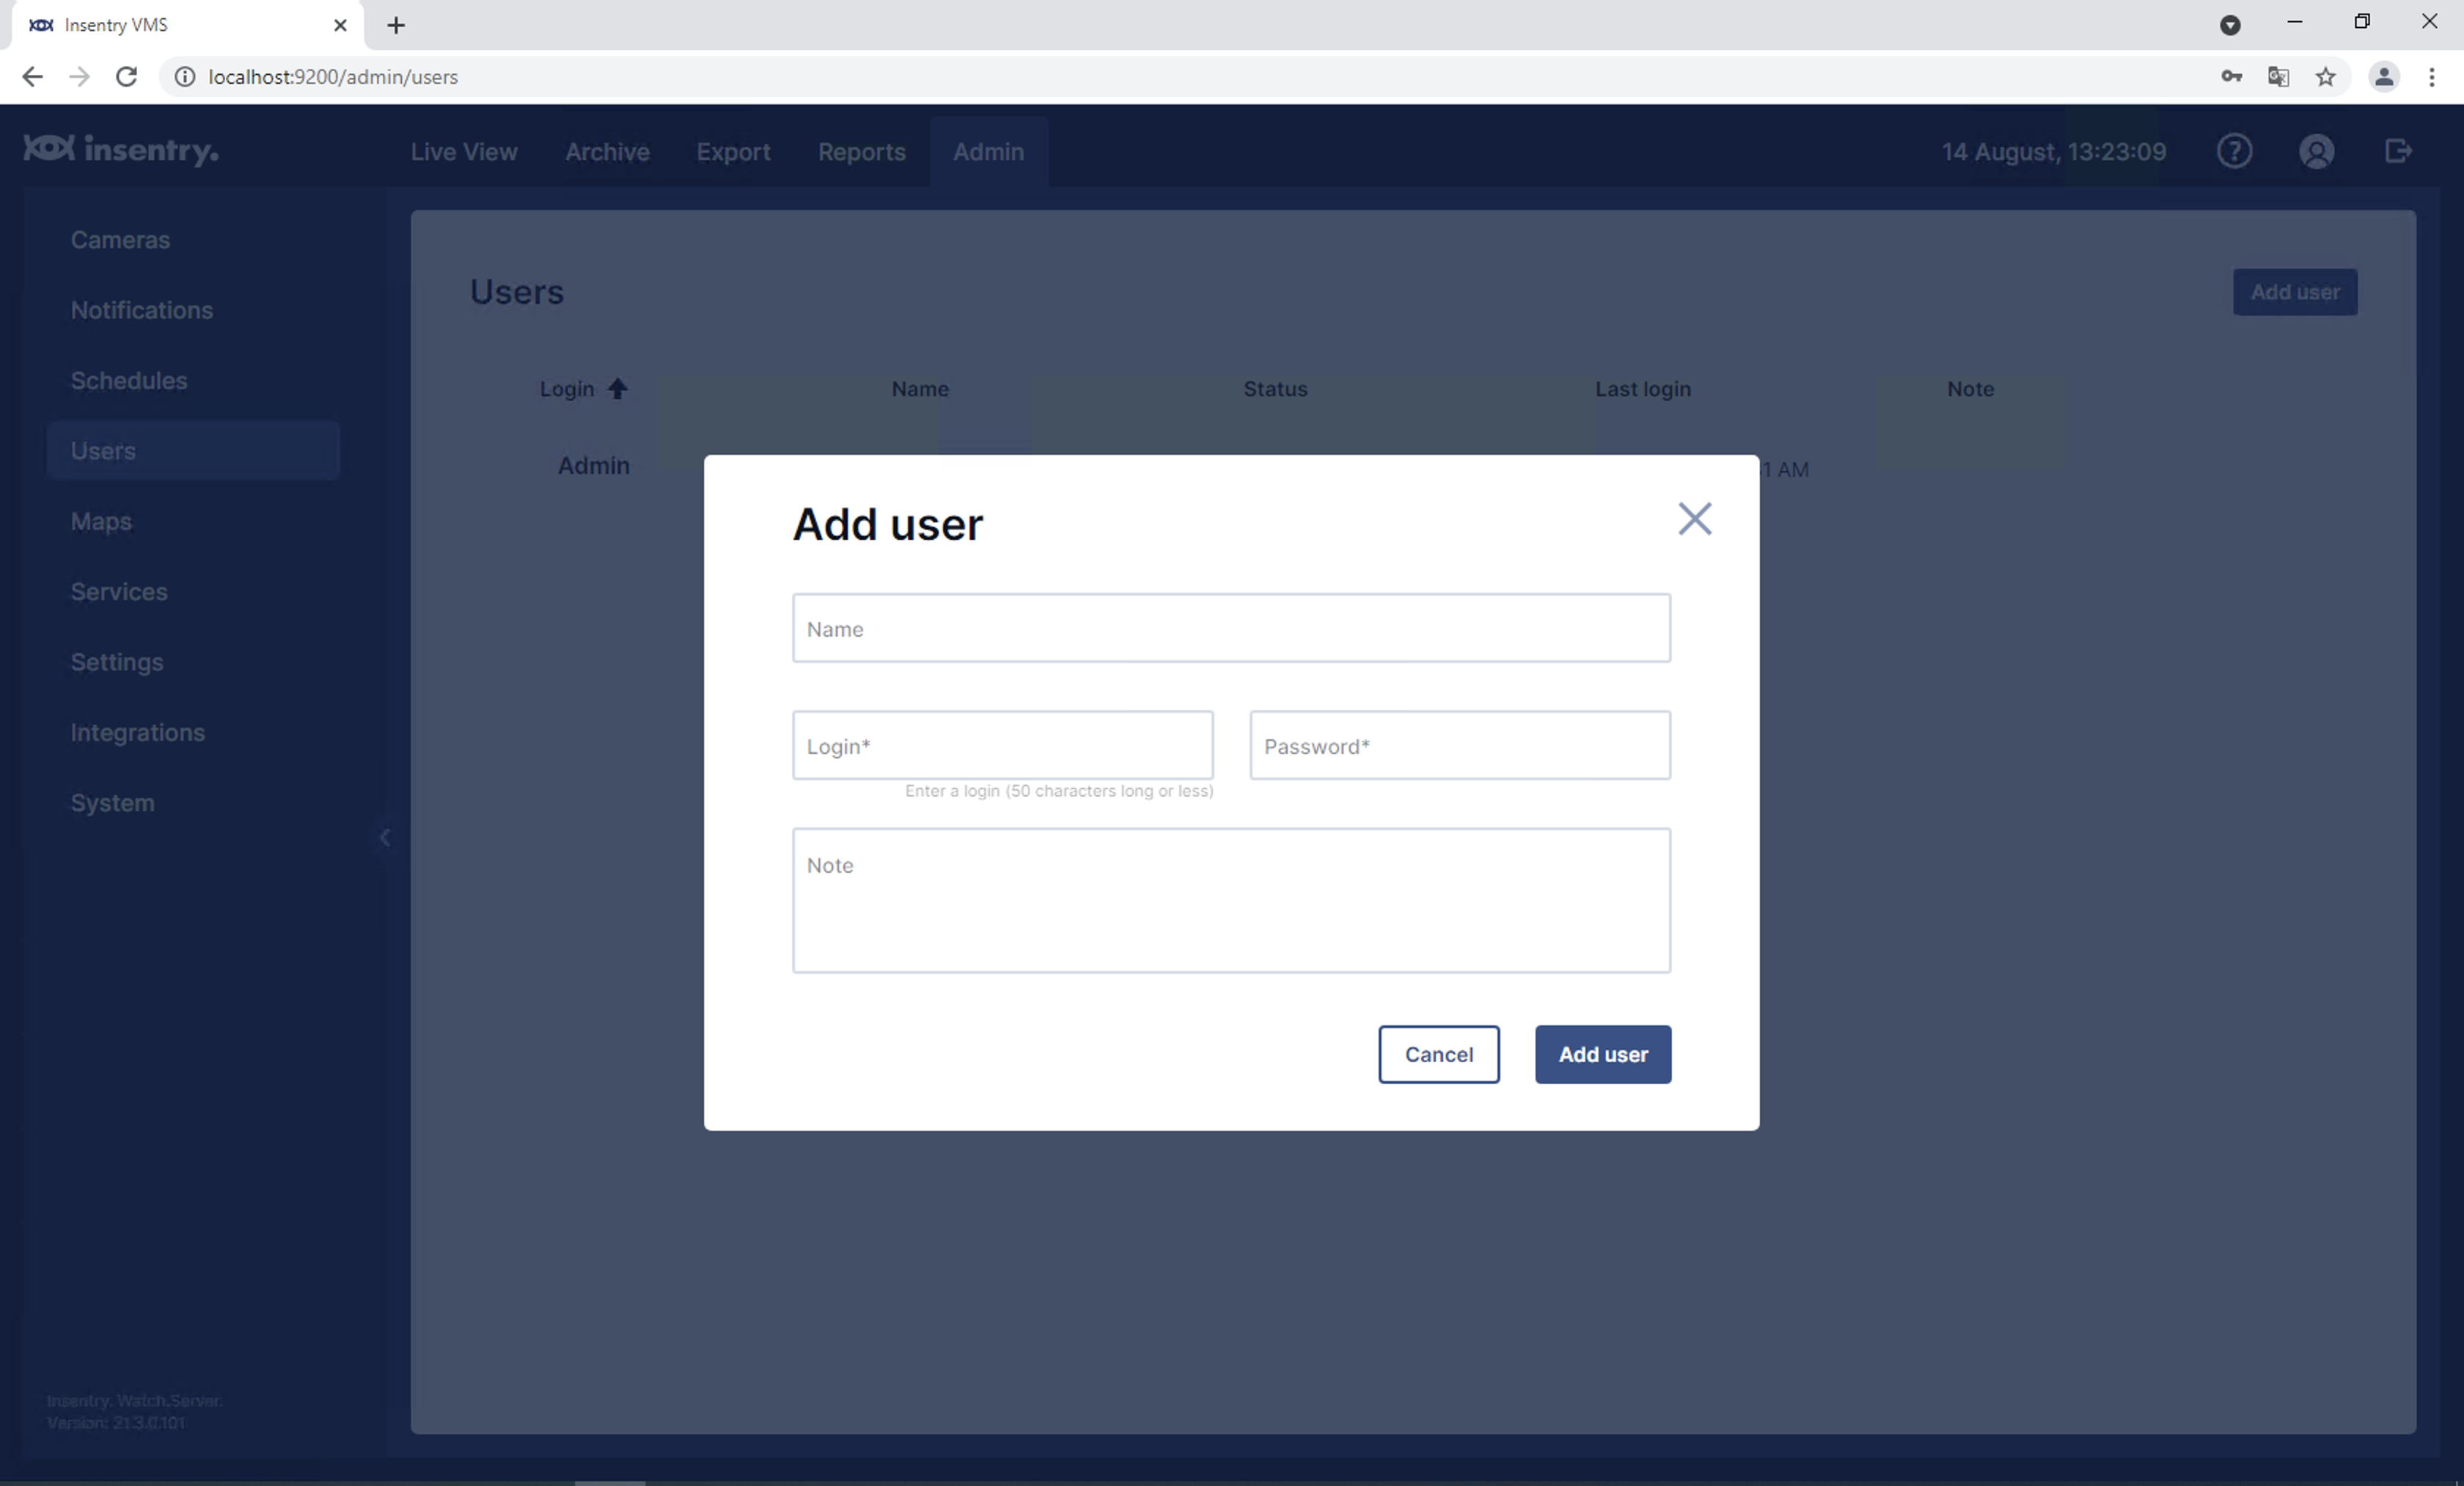
- Navigate to Users screen of Admin tab.
- Click Add user.
- Set Name (custom text), login and password for user.
You can modify already created users, clicking the name in list.
On Cameras tab of User you can configure permissions for every Camera and subsystem.
Operation
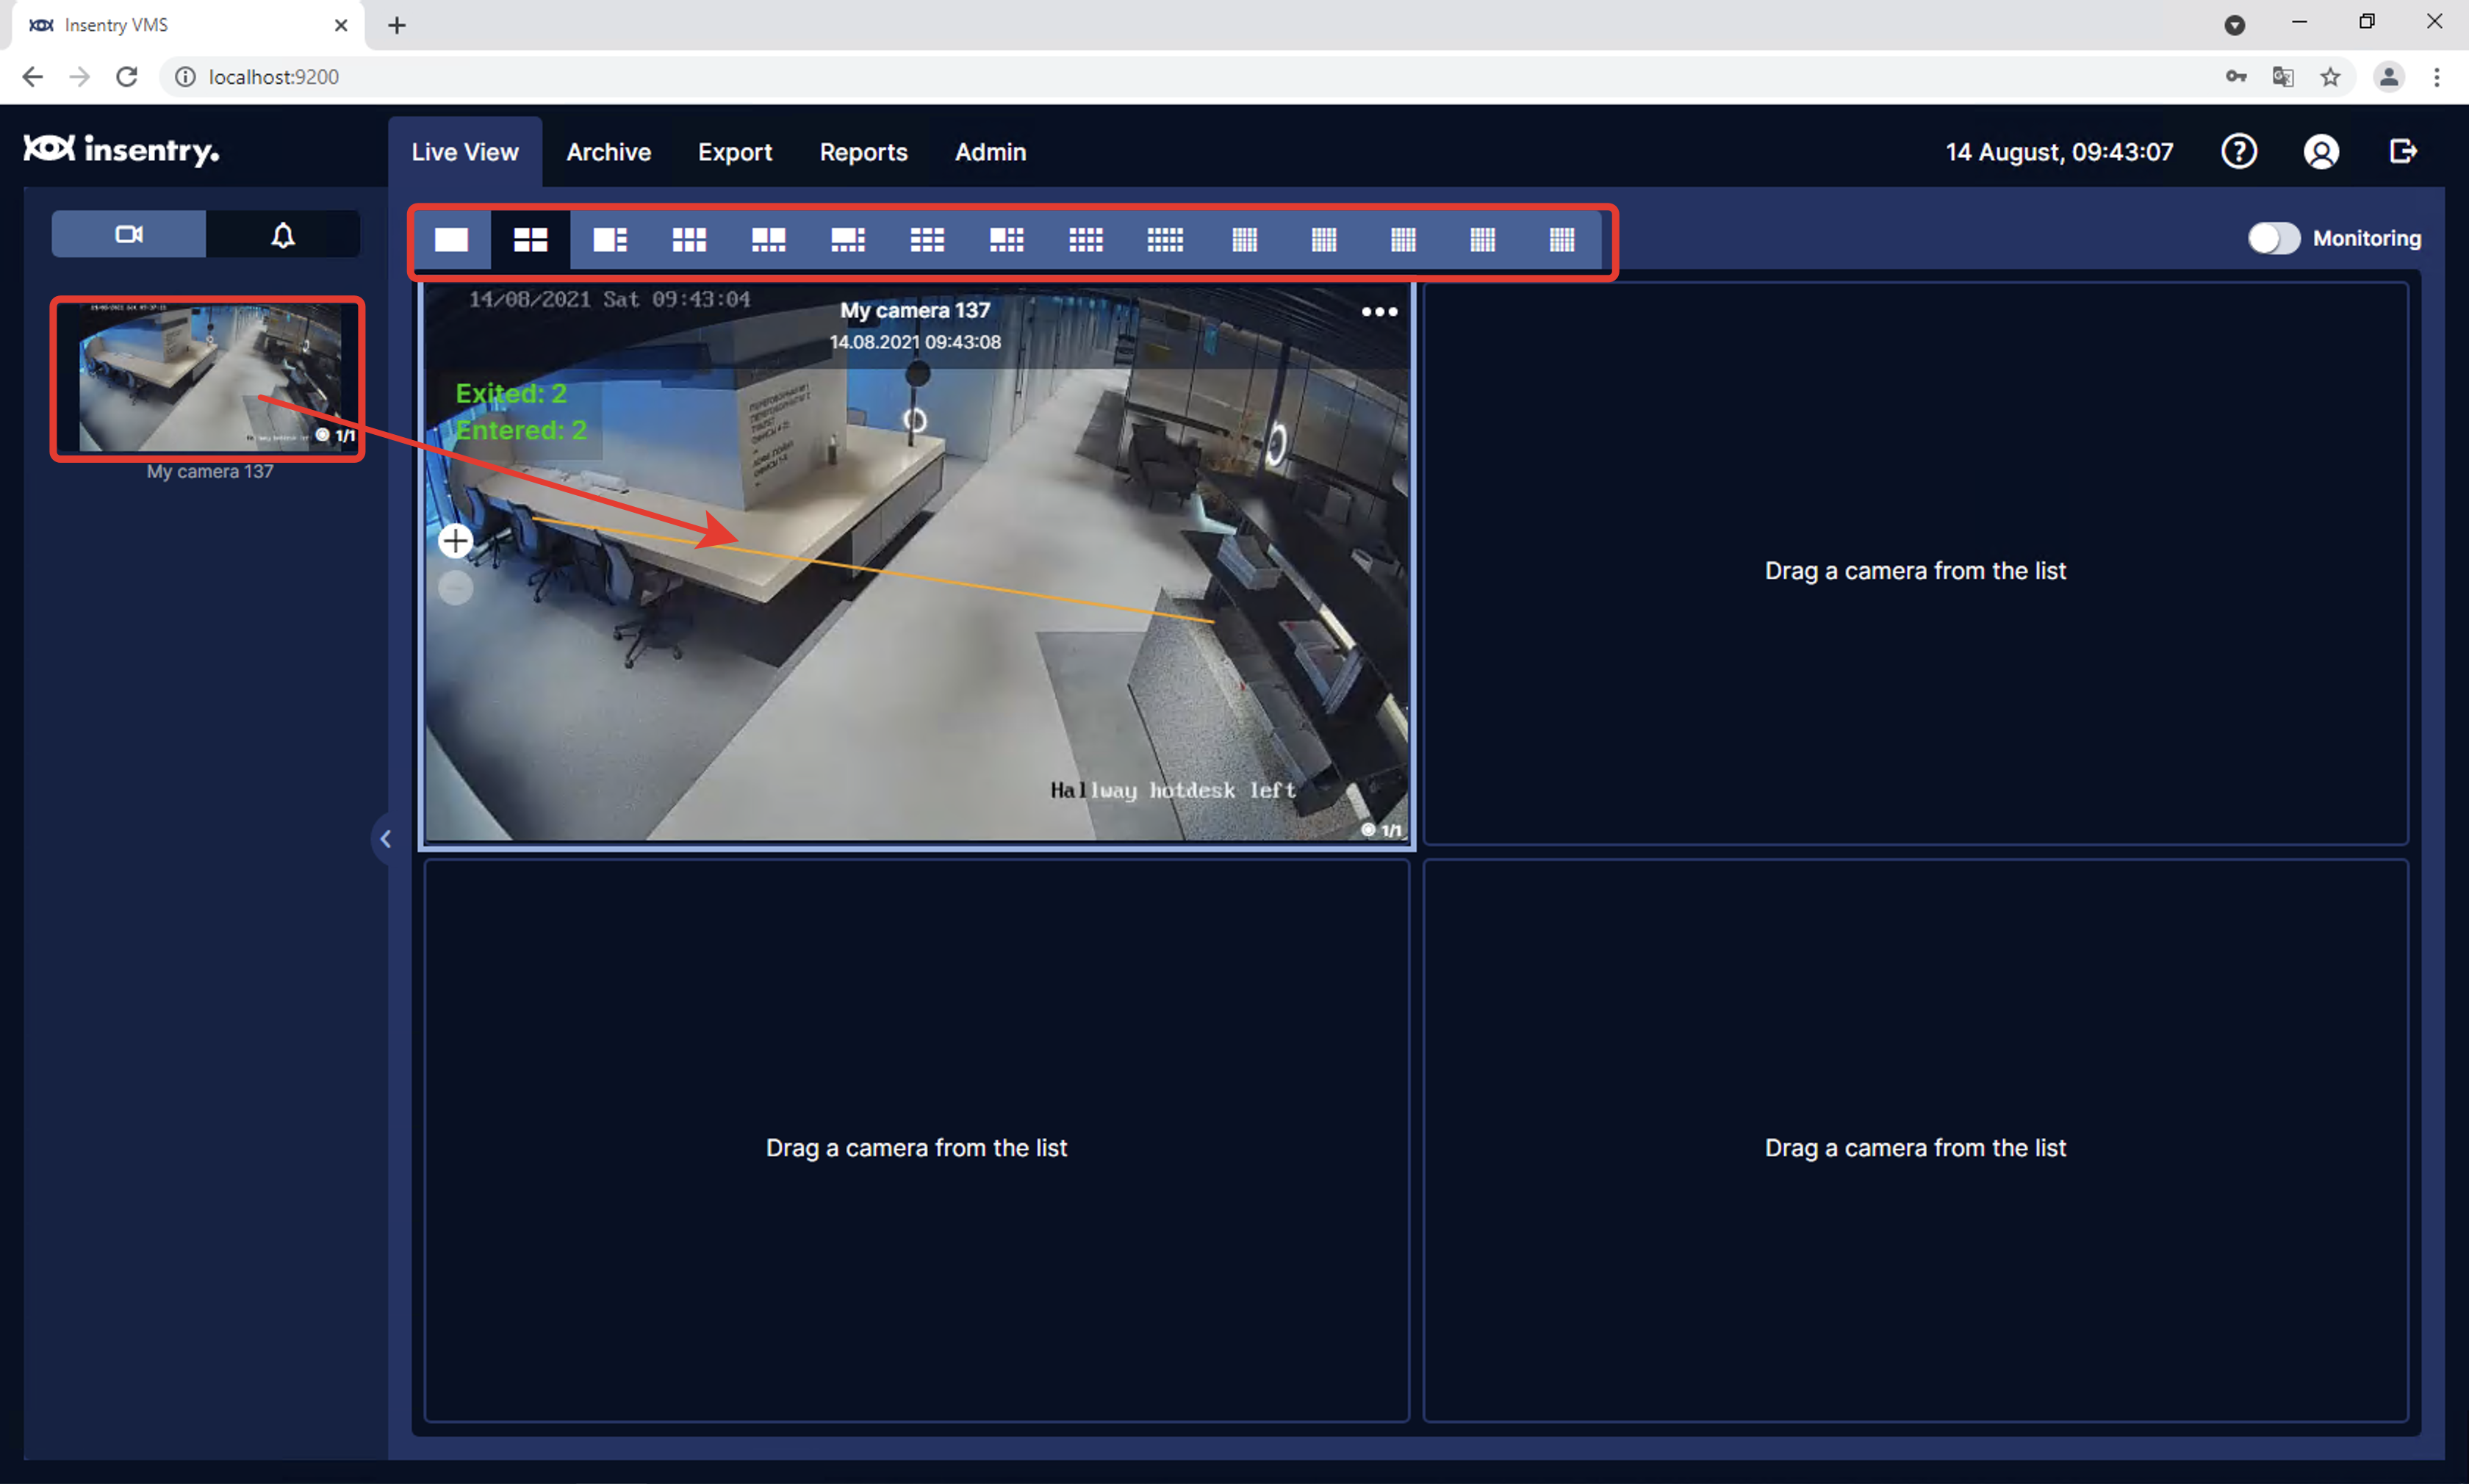
Live view
- Login to the system using http://localhost:9200 and login/password for admin or valid user.
- Navigate to Live View tab.
- Select type of screen.
- Drag and drop cameras from the side panel to slots.
Archive view
You can access recorded video from cameras on the Archive tab, same way, like in Live view.
Recording to archive must be configured in Admin tab
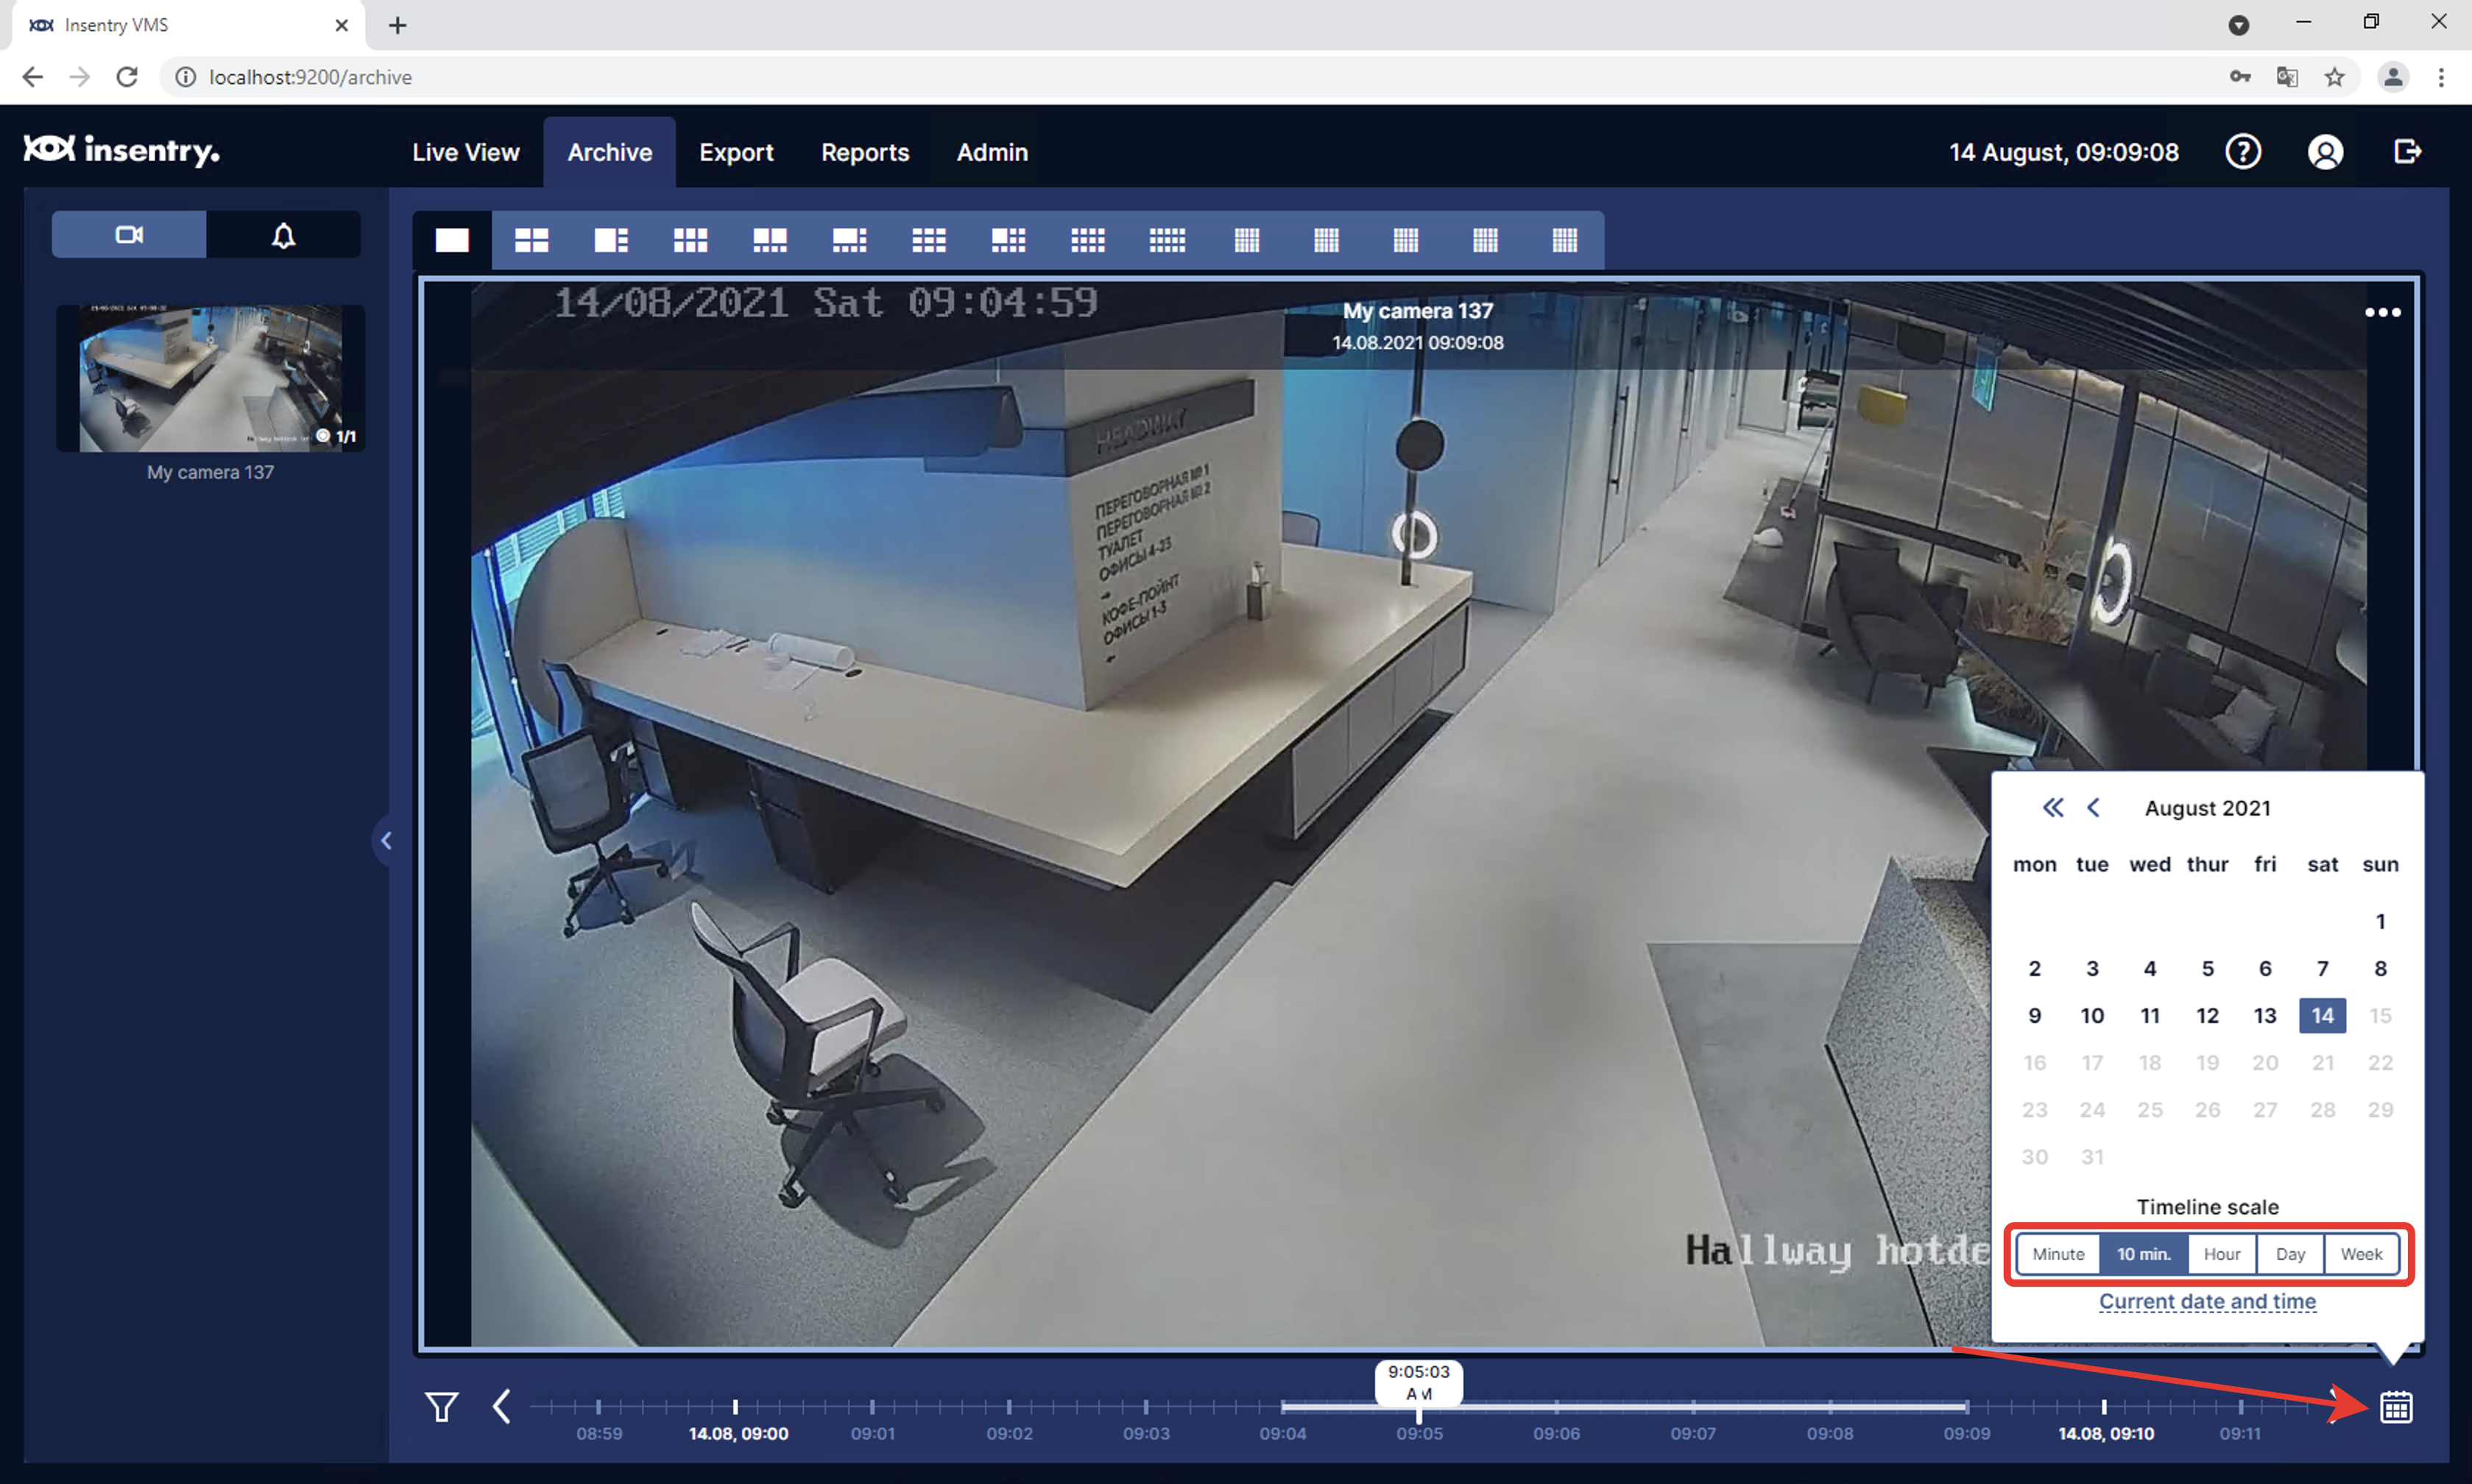
In Archive tab you can navigate through timeline.
Using Calendar pane you can quickly change Timeline scale and navigate to the date.
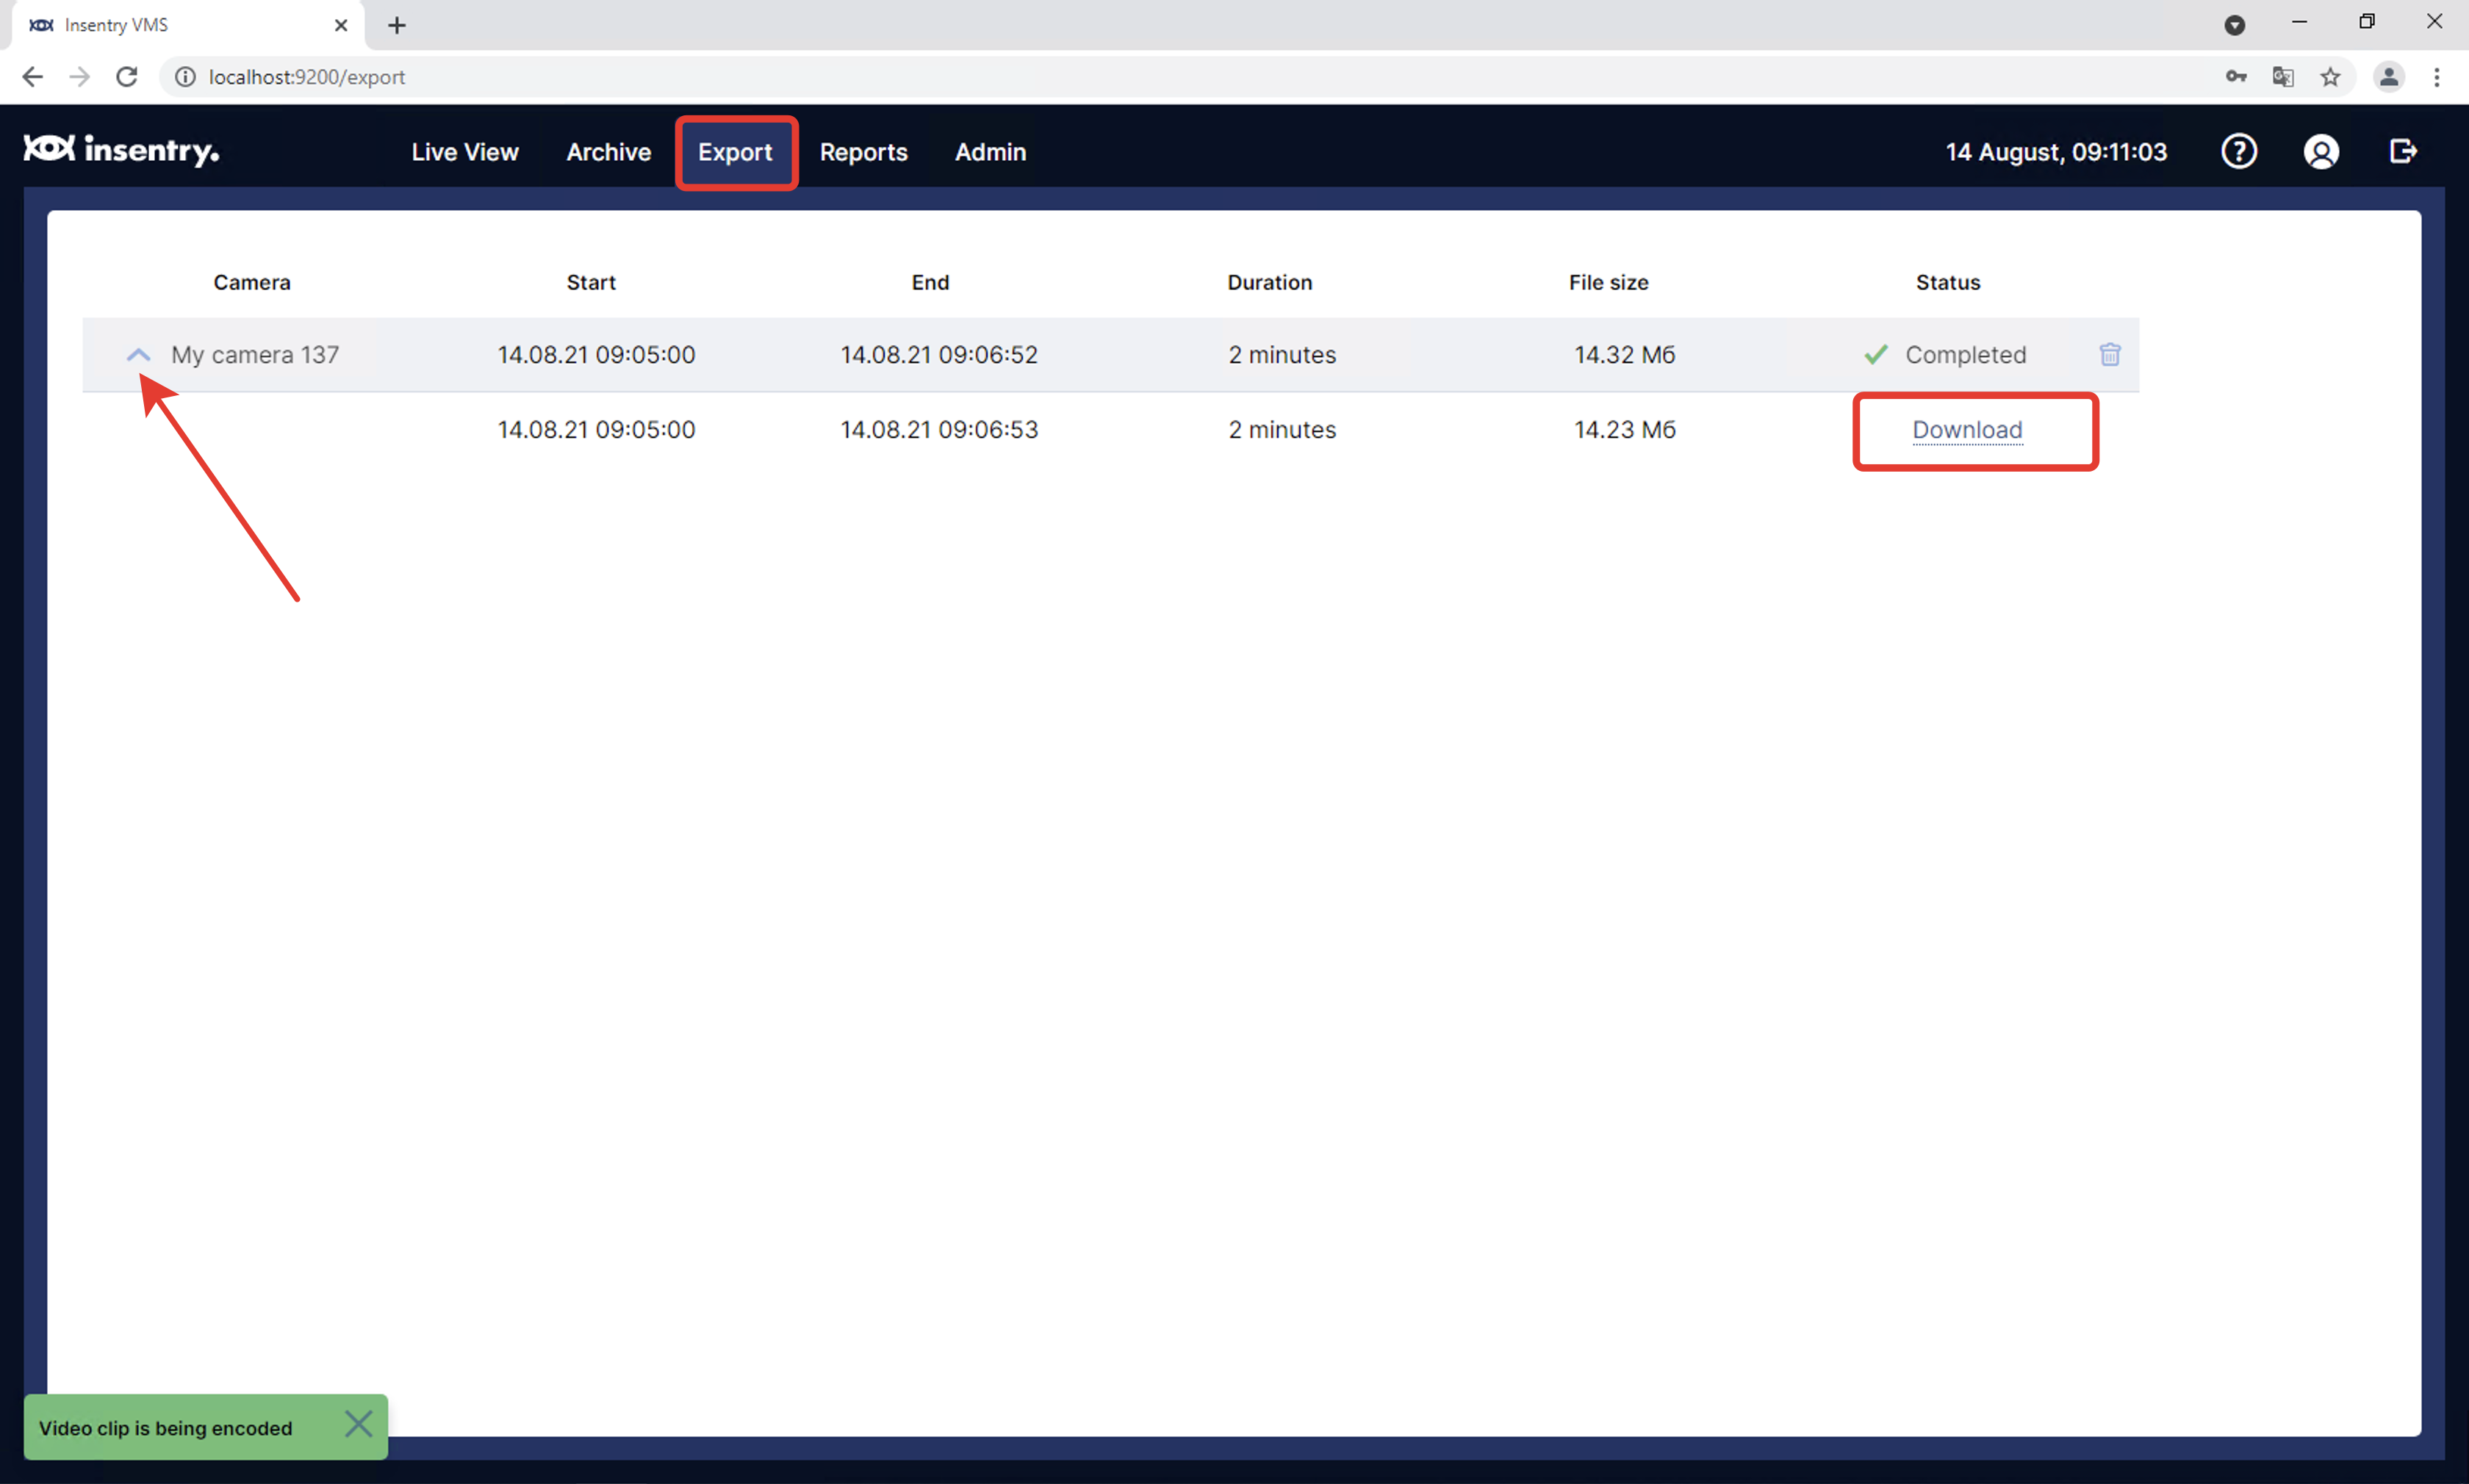
Exporting video to the file
Navigate to the Archive tab.
Drag and drop target camera to the slot.
Using timeline navigate to the target timestamp.
Using Calendar pane set timeline scale.
Click Export icon.
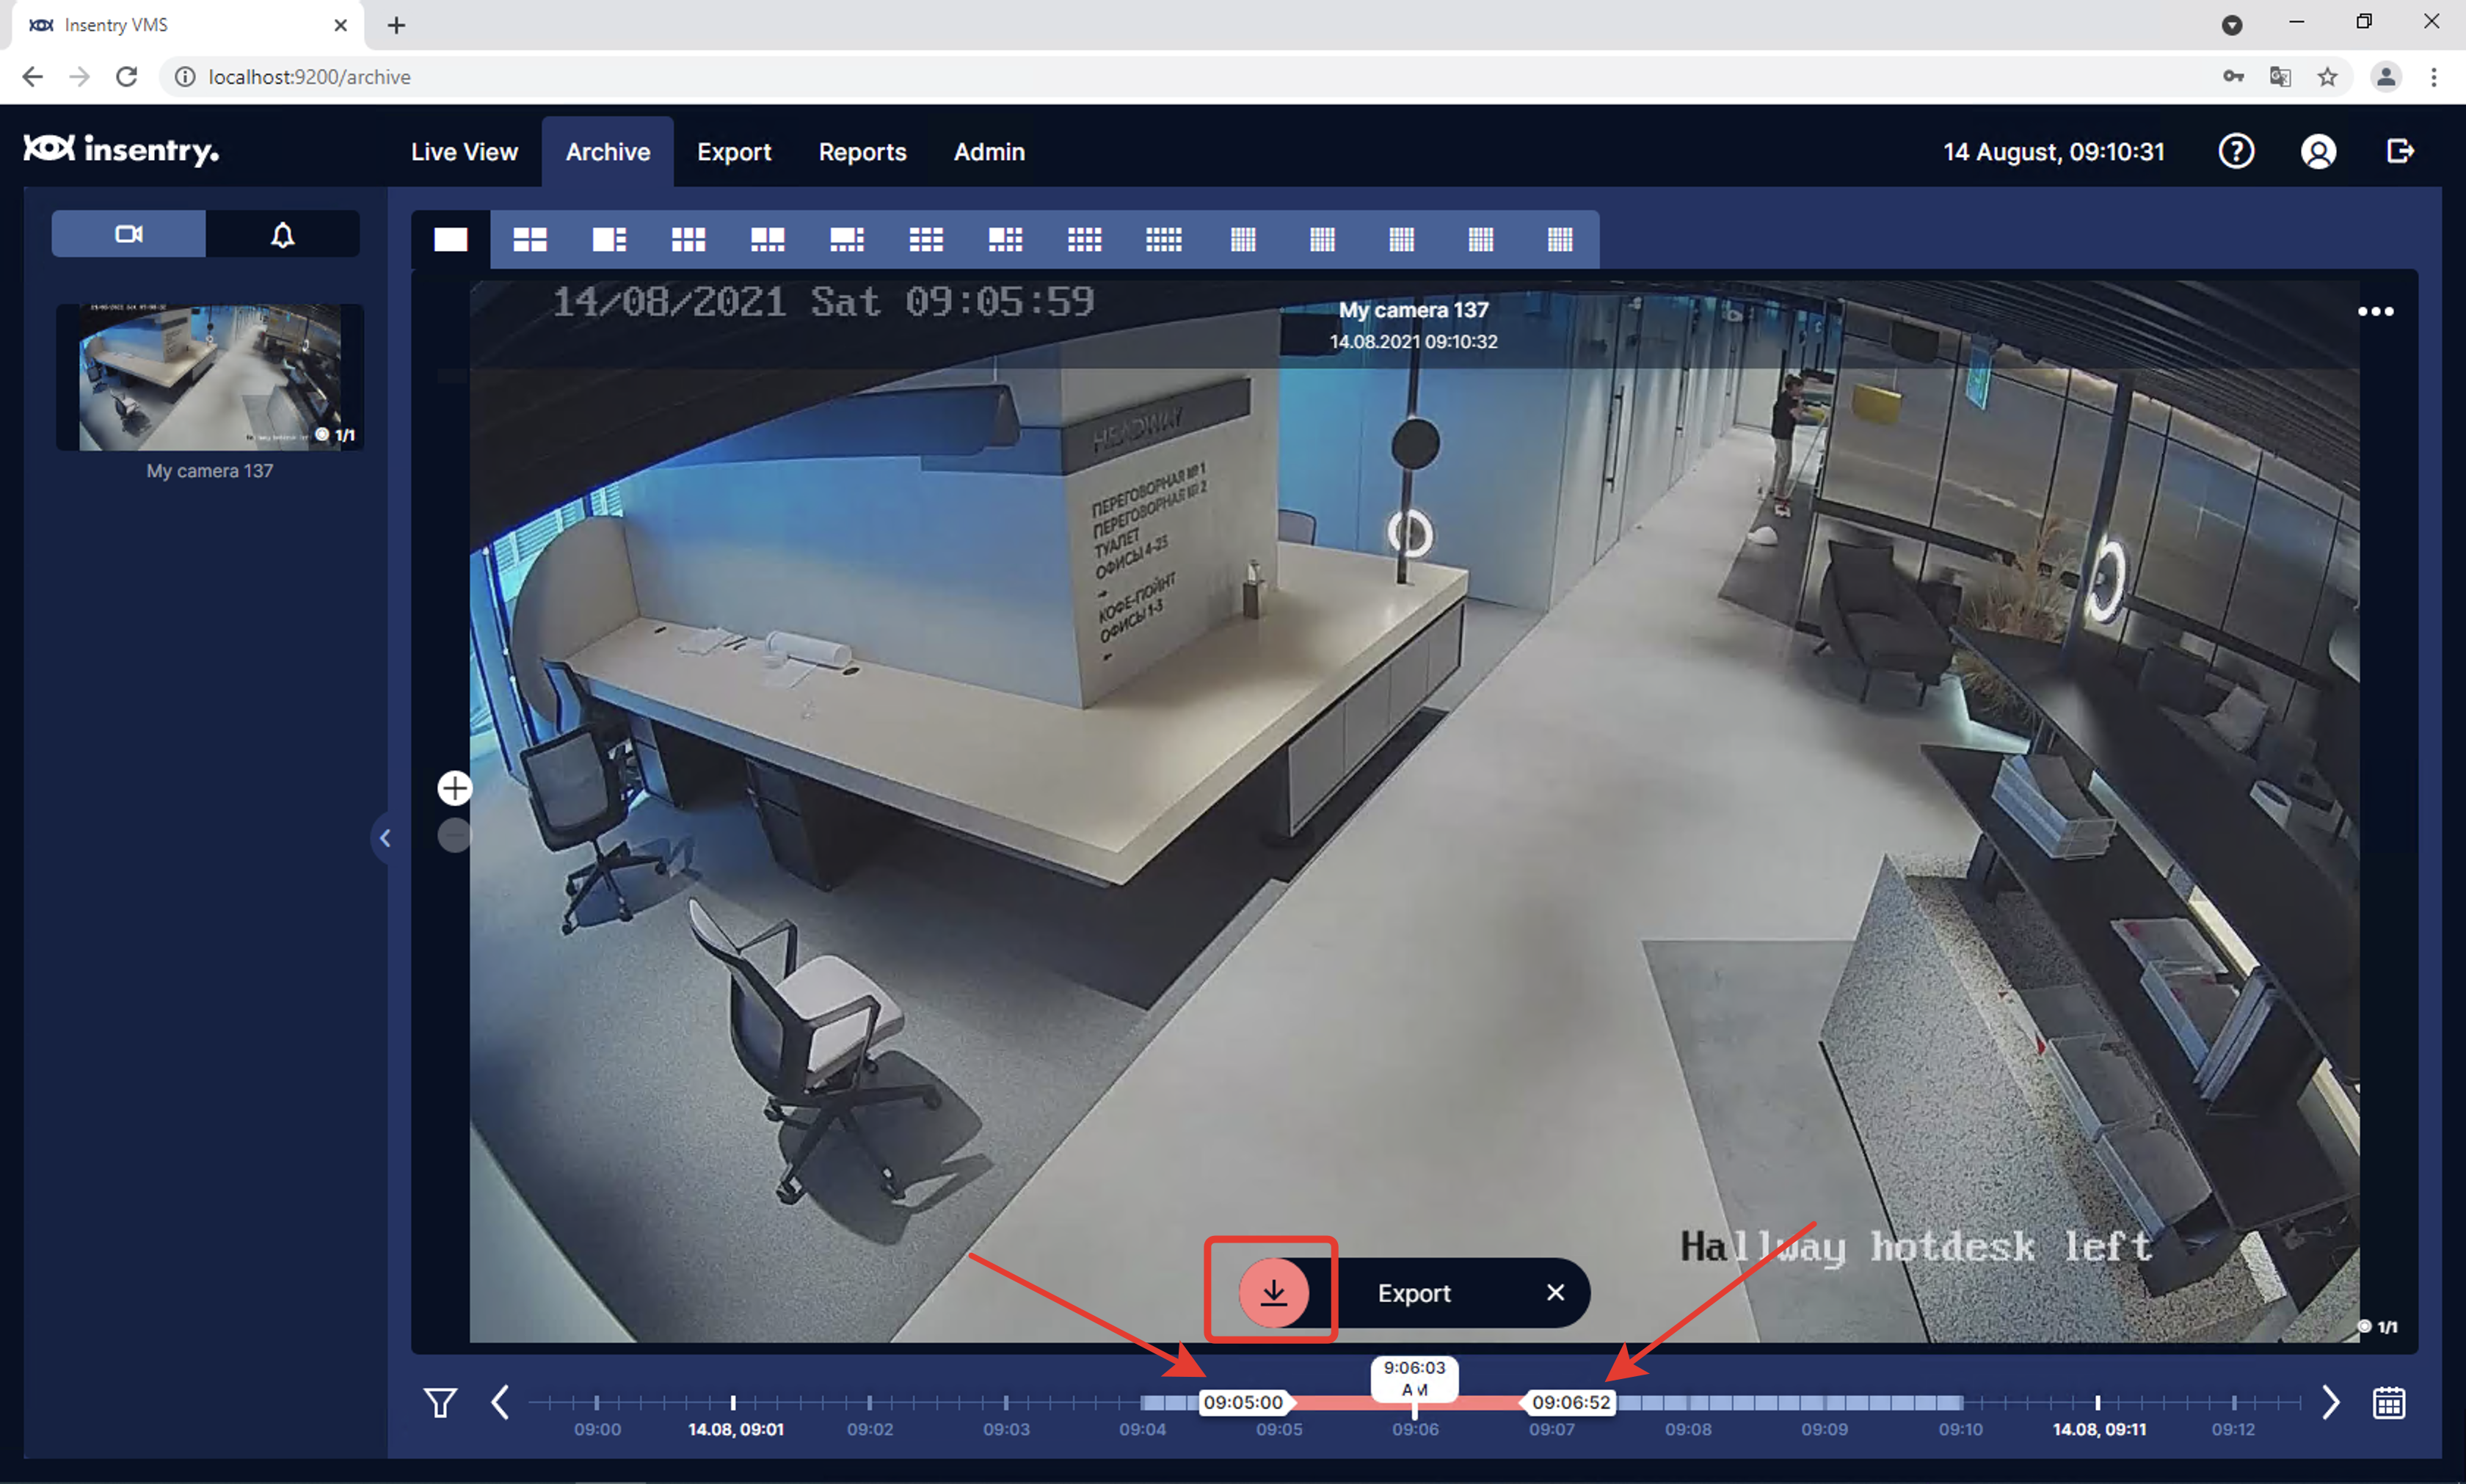
Using active borders set start and finish timestamps on timeline.
Click Export button.
Switch to the Export tab.
When decoding of file complete, you will be able to download mp4 file.
Using video analytics reports
- Navigate to the Reports tab.
- Find type of detector, you have previously configured (not all detectors collect data for reports view).
- Click on tile with detector name (in subtitle you can see, how many cameras are configured with this detector).
- Select cameras, you are interested in.
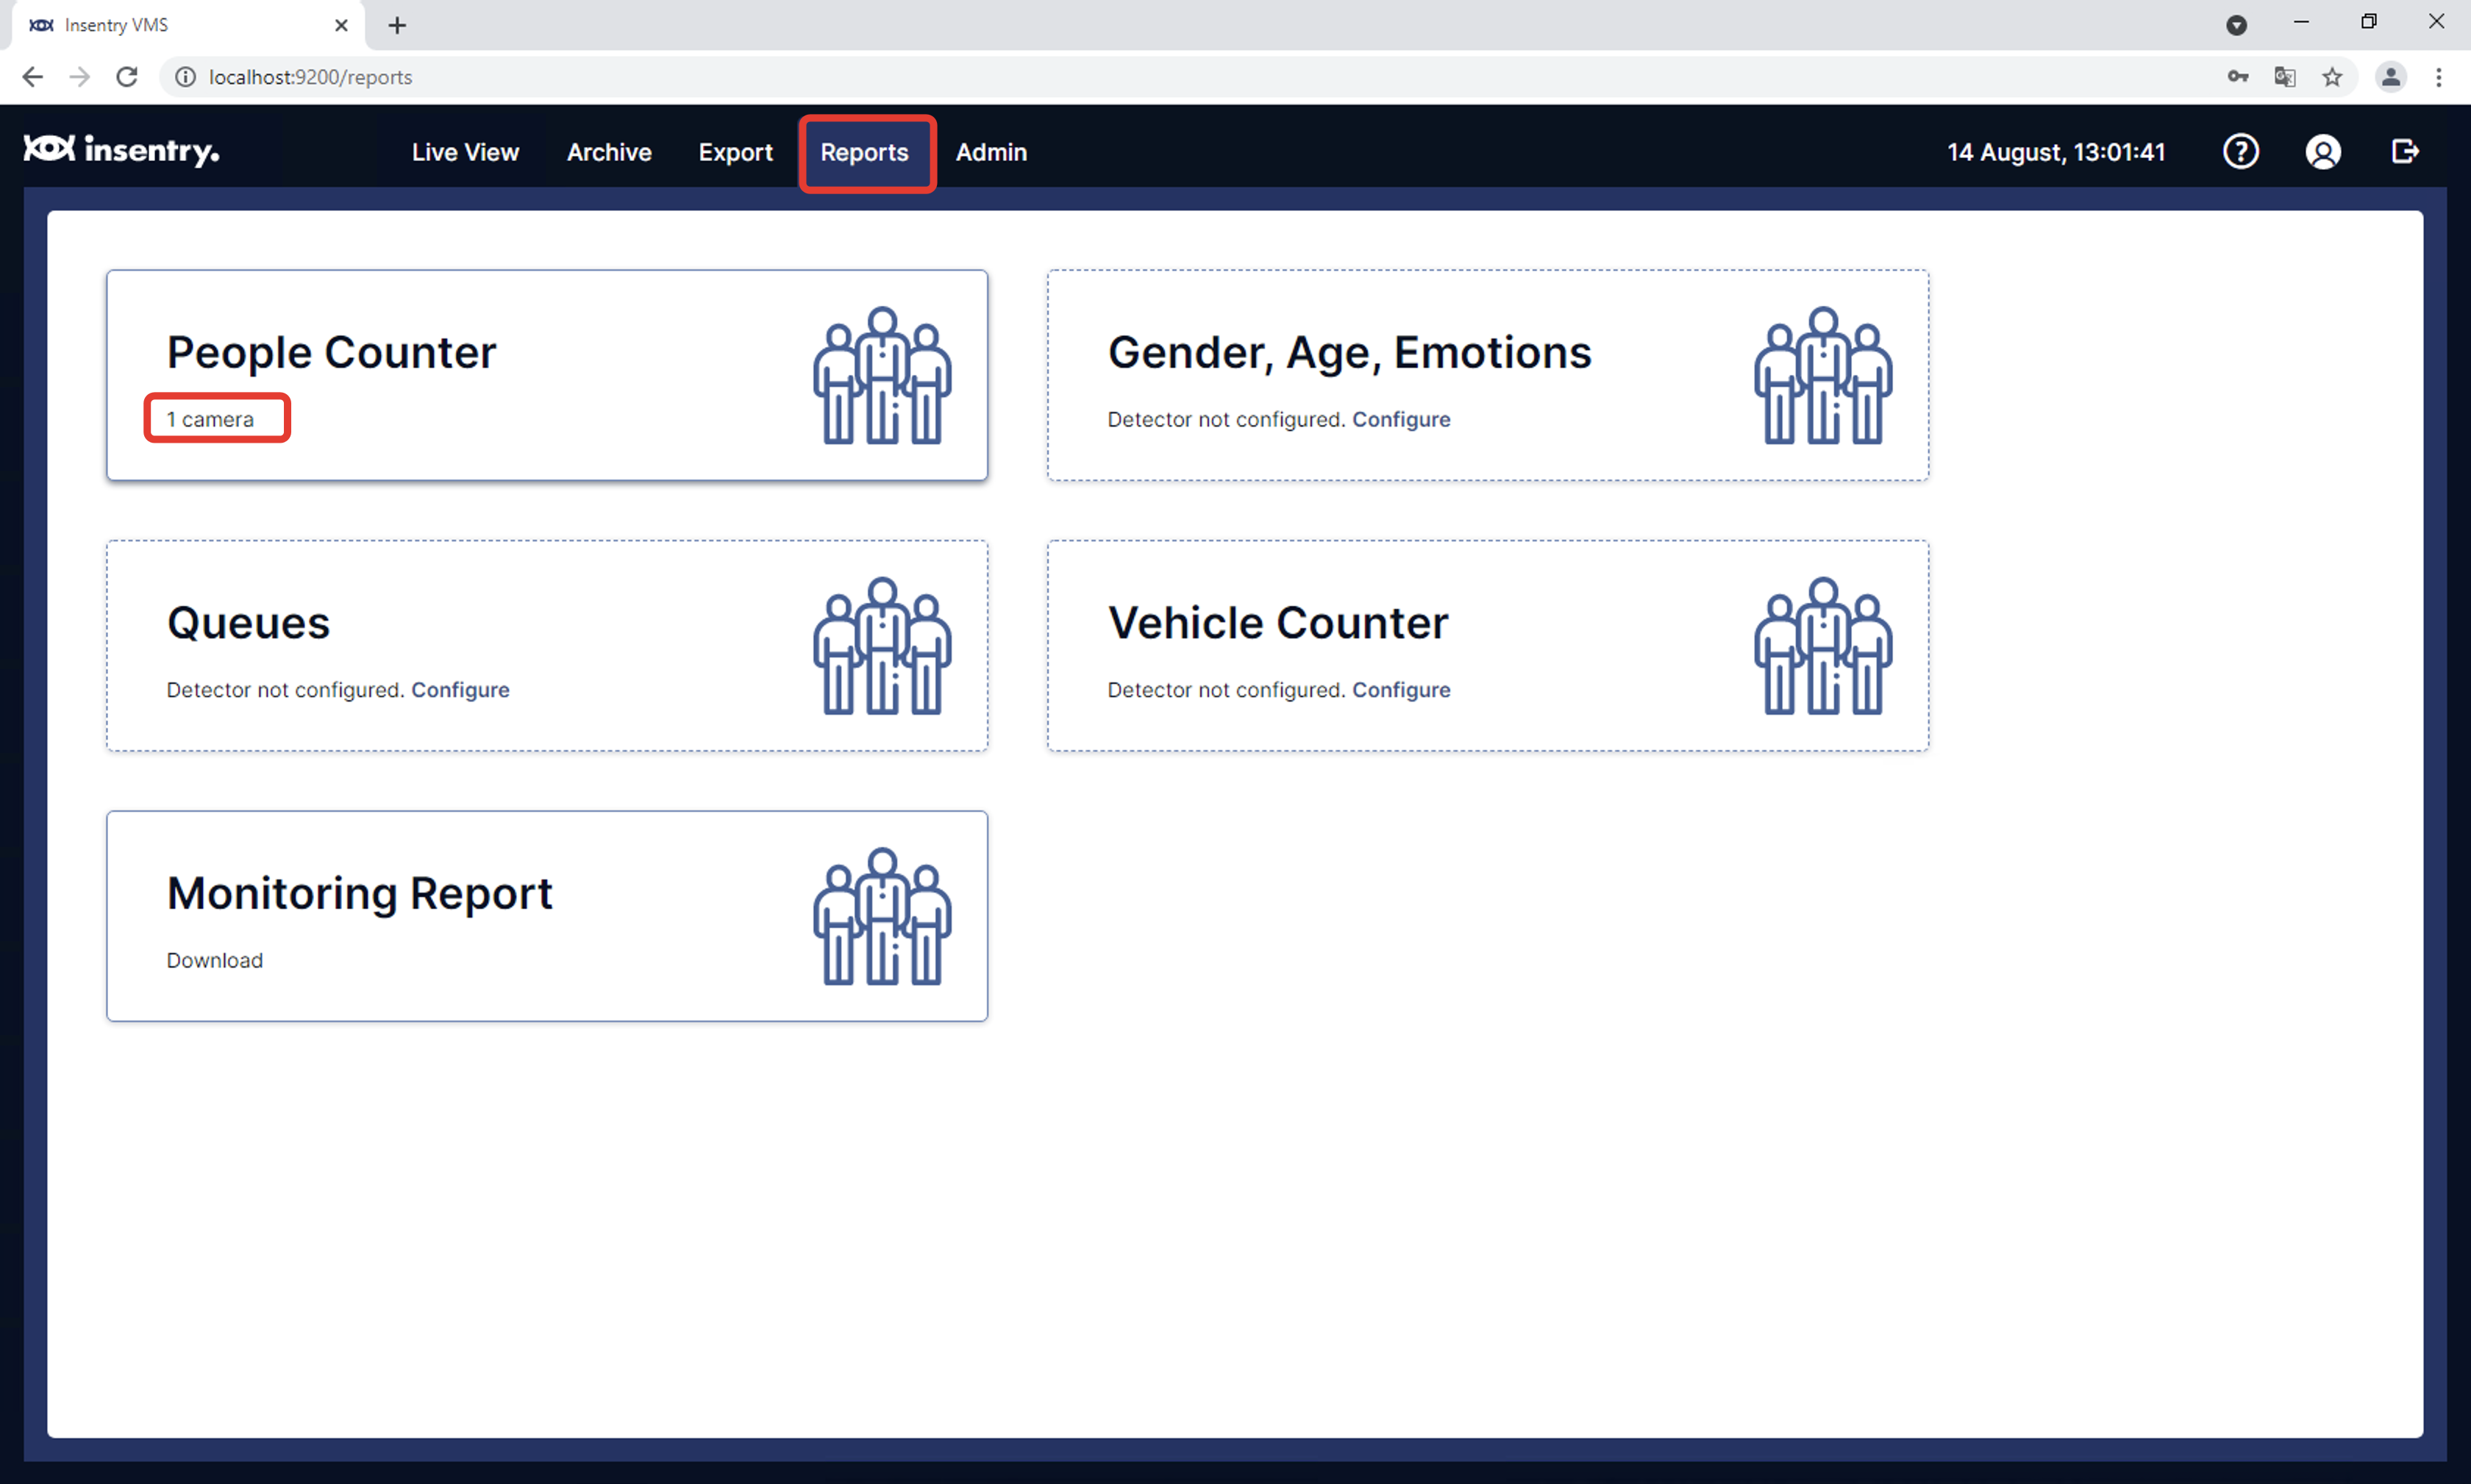
Using navigation pane you can change time interval, scale, set of cameras, used to make a report.
